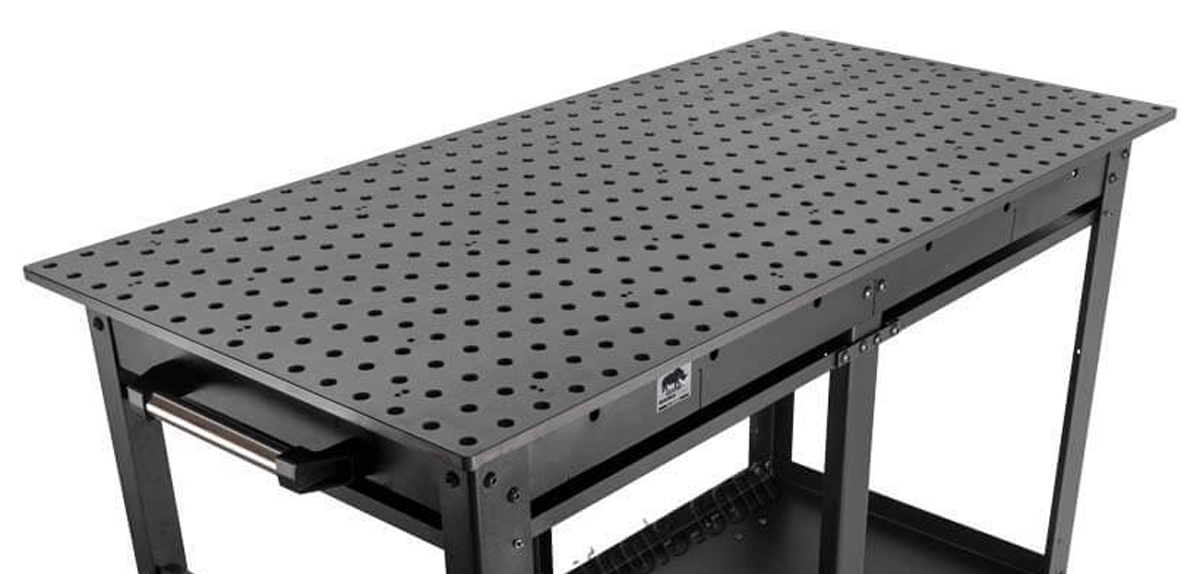
Like many, I have a small problem with the Rhino Cart in my shop. I love the BuildPro system and Rhyno Cart is a really good product. The issue is the flatness of the surface, specifically, I have a low drop in the middle of the raster table.
I’ve known since the Rhino Cart showed up in my shop a few years ago that it had this issue with flatness. It’s not the most flat surface in the world. Measuring with a straight edge and feeler gauge, a few thousandths of an inch will be measured. I wanted to fix that.
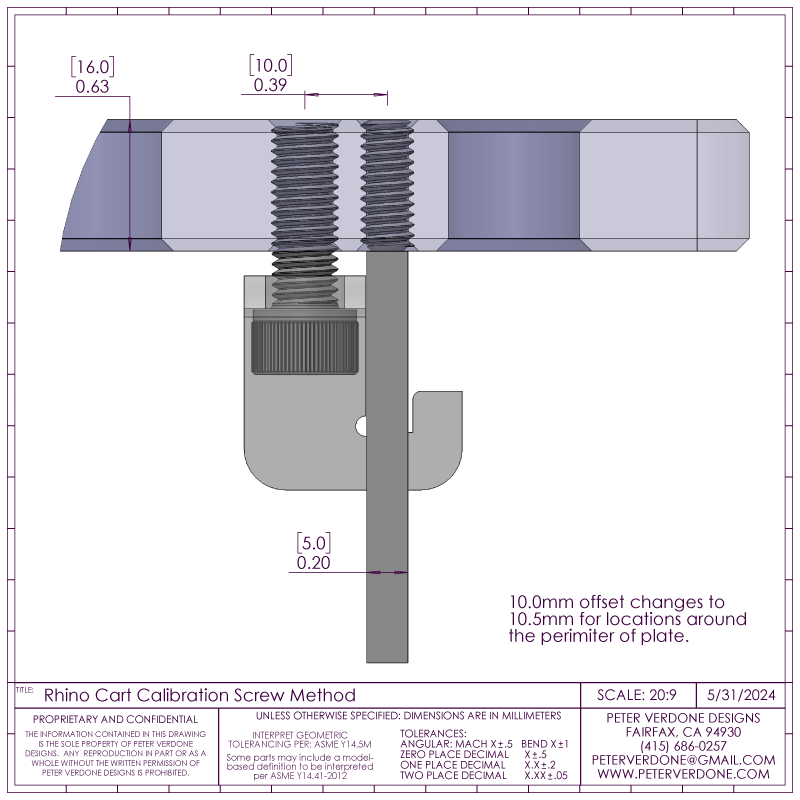
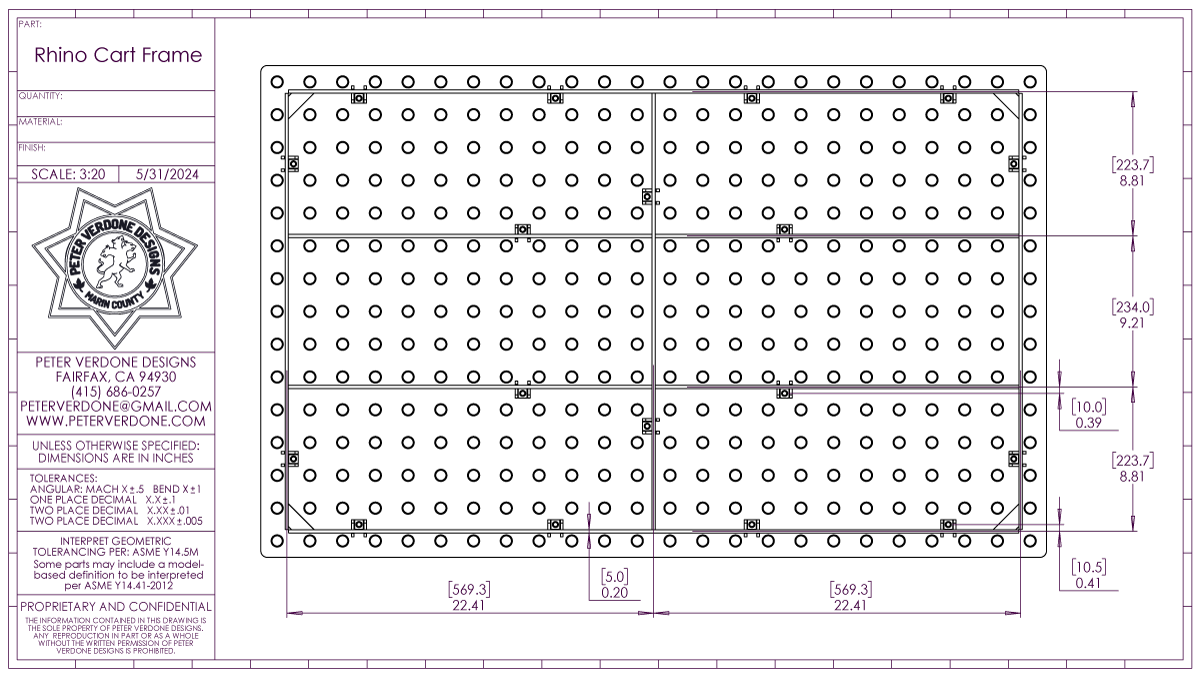
This past week, it was time to fix the problem. I did some measurements and played with models in the computer to sort out a plan. The Rhino Cart 60″x30″ (TD5-6030Q-F1) version has provisions for some calibration and that was my inspiration. I got that all written out to prevent any sort of mistake from happening. This can be confusing work.

I made some handy drilling fixtures to help with the job. They use 4x McMaster #8492A101, Press-Fit Drill Bushing with Head 0.201″ ID, 3/8″ OD, 1/2″ Long. This job was hard enough to do well with this fixture. Without would be foolish.
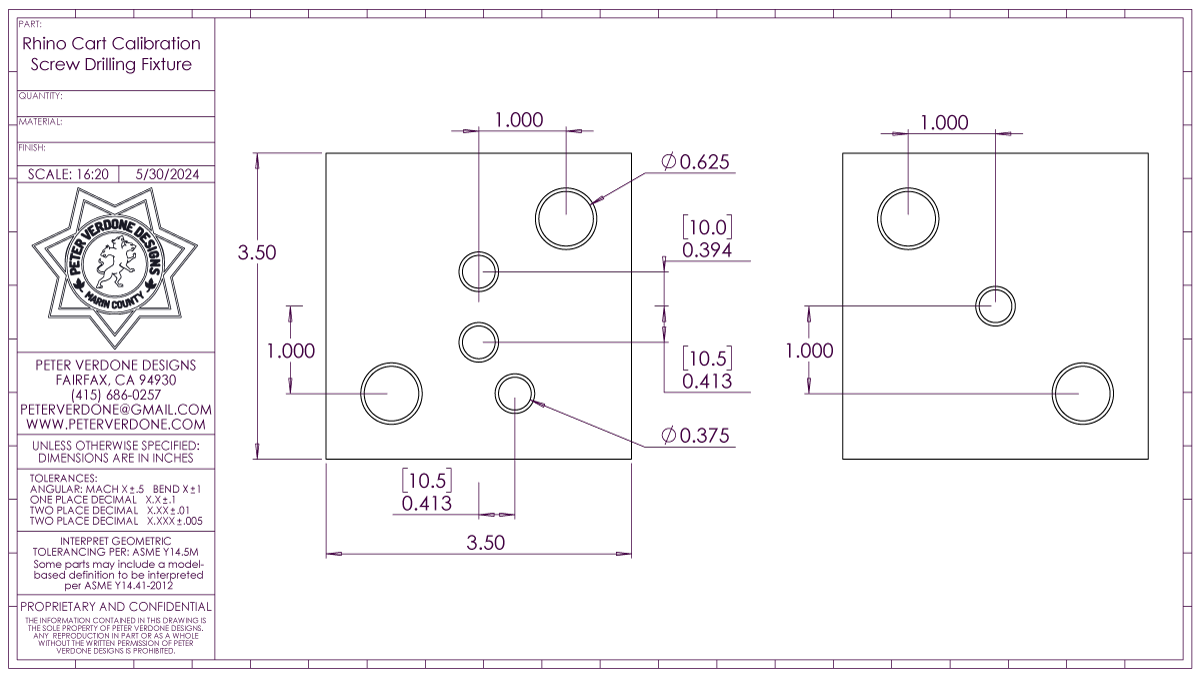
Even thought I brought a mag drill in from home for this job, I ended up hand drilling and tapping the 21 holes in the plate. Something about having a drill bushing pushed me that way. I may have been wrong.
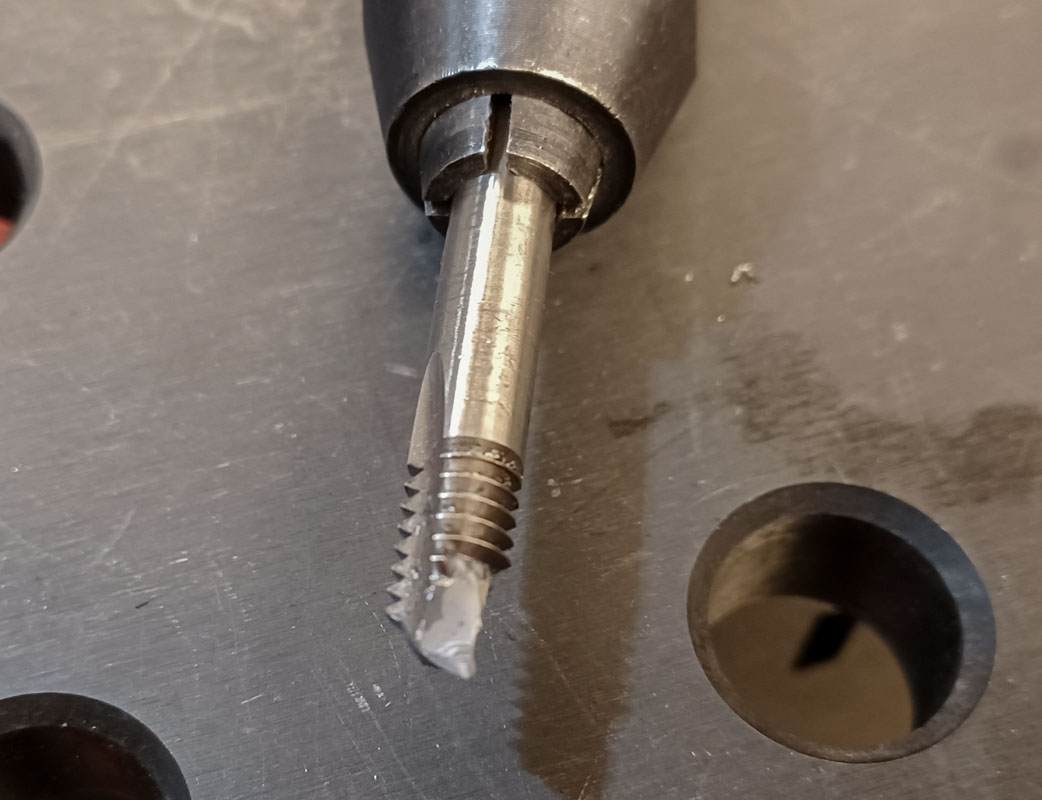
I broke one tap and one drill, extracting both without damage to the plate. I did tap the table in the wrong location with a drill once leaving a small mark, my bad.
For leveling screws, 21x McMaster #94355A707, 18-8 Stainless Steel Flat-Tip Set Screws 1/4″-20 Thread, 5/8″ Long.
The method for flattening the top of the cart threw me at first. The first few tries didn’t work out well. It took some time to figure out. In the end, I approached the job similarly to how we build bicycle wheels. Using a 48″ straight edge, resting the plate without any tension on the screws over the frame, I started by lifting low sections with the adjustment screws to the limit of the weight in the table could do. Then the rest of the adjustment screws that weren’t needed in that initial change were lightly set on the frame. Then the fastening screws were very lightly cinched around the whole table. Then flatness was checked again with some fine tuning around the table. Then the fastening bolts are tightened even more. Another check around the table, then fully tightening. It worked very well.
Now the table top is within one or two thousandths of flat over the whole surface.
Setting level with my 12″ Starrett No. 98-12 Machinists Level was now a lot easier. It’s not perfect but it’s a lot better.


