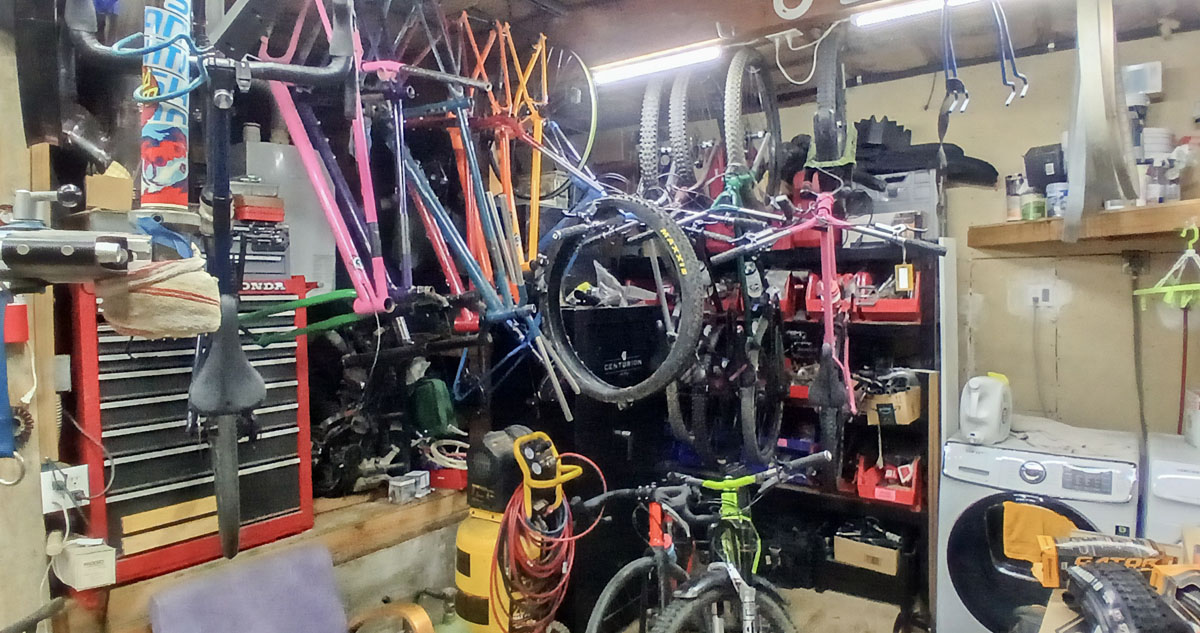
In the world that I live in, bikes start accumulating and in the SF Bay Area space is a premium. That starts creating problems. How can bikes be stored more compactly but also be made easier to access? There are a number of solutions out there but this one is for those interested in a long term, industrial strength, and scalable solution.
This solution comes to from Ronen Sarig. He’s been bugging me about doing this since he did it in the apartment where he lives in SF. I made some slight improvements from what he did to agree with my sentimentalities.
It’s all pretty simple, really. Little steel bearing shuttles in a track with bike hooks attached. The devil is in the details and poor choices can have consequences.
There are other more expensive or lower quality solutions for this being discussed on the internet. It’s really impressive how poorly some of what you will find are executed. I’m amazed at how many examples are entirely screwed up. Be careful out there. The solution shown here is about the most solid, cheapest, and most extendable that I know.
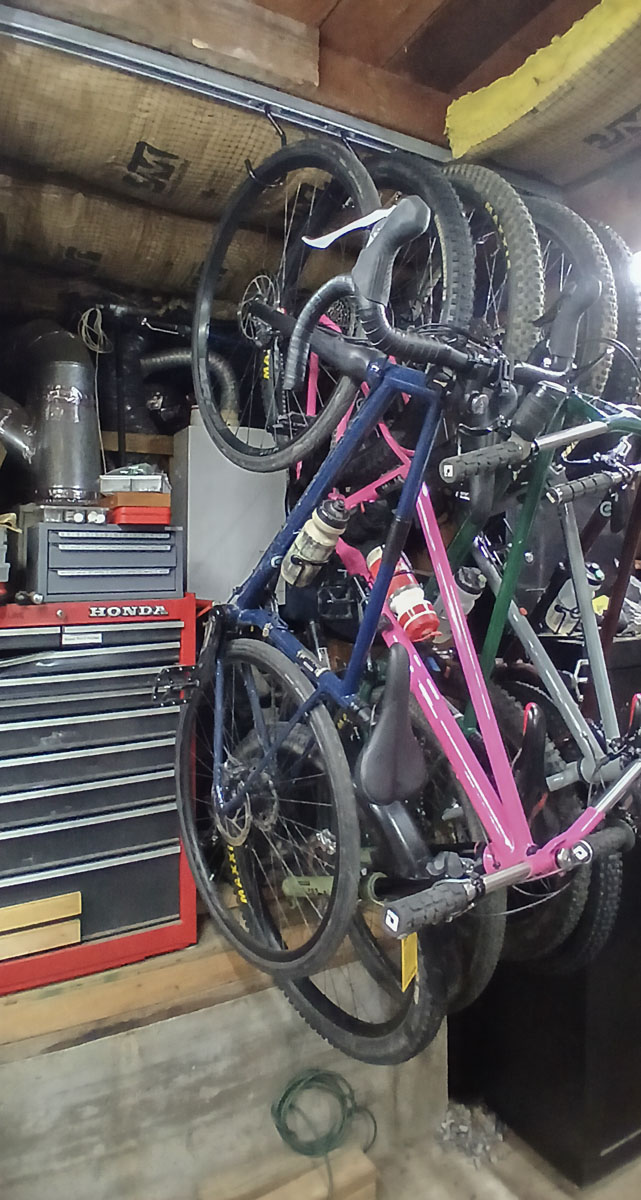
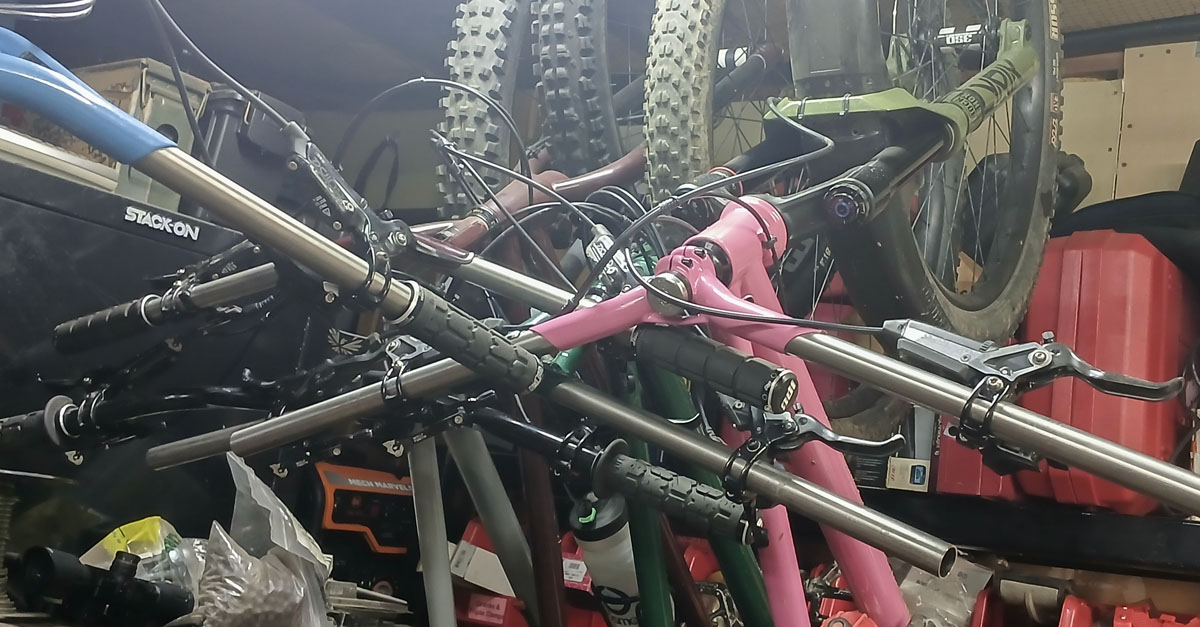
Below, you can see five bikes taking less space where three used to be. More, if I need to get to the motorcycle frame and motor that’s hidden behind, I can just slide all the bikes over on the track. Easy.
Shuttles
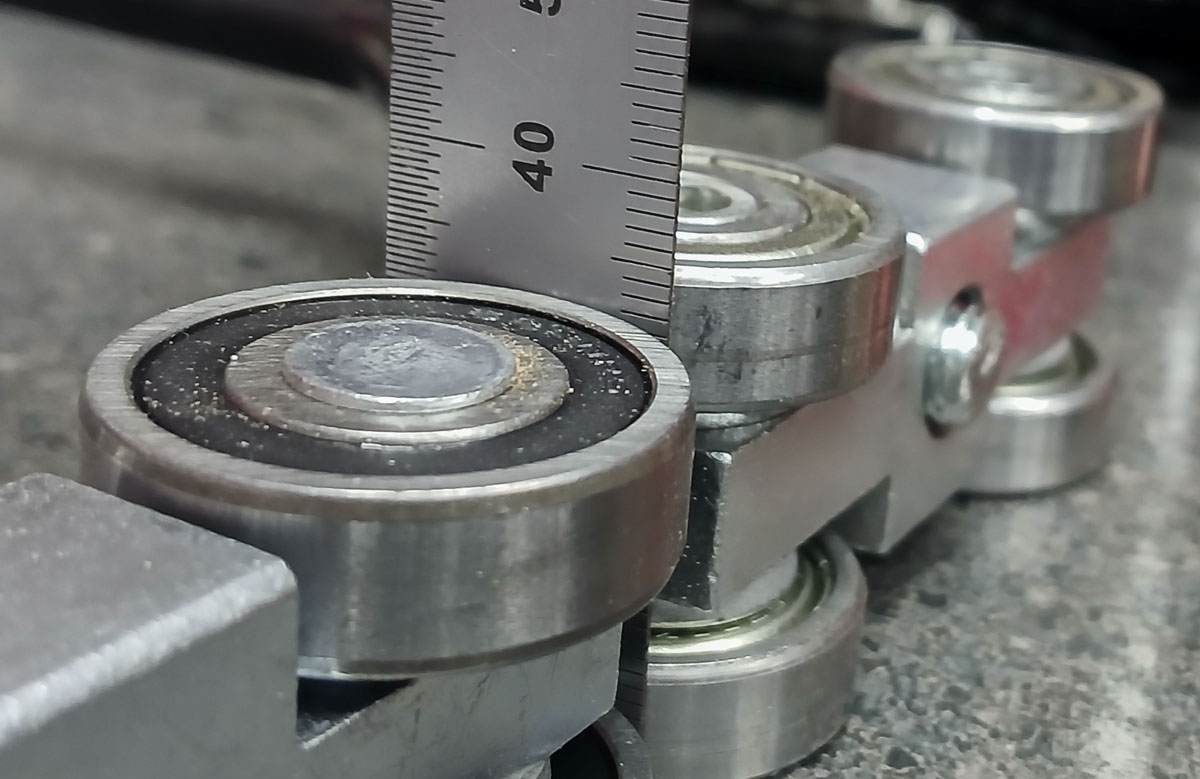
The shuttles are commodity stuff from Amazon. They cost about $13.50 each in the current era. This may seem like an expensive foundation for a system but given the quality and scalability, it’s not. These things are tough and you’ll have them for the rest of your life. 30mm bearings roll smooth and nice. Steel on steel. The trolly fits snug in Unistrut so there isn’t a lot of play.

Be warned. There are 34mm wide shuttles and 32mm shuttles. The 34mm versions are nice and solid but can find resistance on sloppy rail. The 32mm shuttles roll very freely regardless but can be less stable. Just make sure to check when ordering.
The M10 bolt and eye nut that comes with it are not used. A shame to pay for this and not use it but the eye nut can come in handy for other projects.
The shuttles comes with a 10.3mm clearance hole through it. We’re going to thread that to M12x1.75 with a tap. It will require a light tap drilling but hardly any diameter is removed by the tap drill of 10.9mm. This thread helps us reduce the stack inside the strut and make the hooks more solid. Then we step down with inserts to M10 or M8 depending on which hook that we use. You could argue that this isn’t truly necessary but I am looking for the best that I can produce.

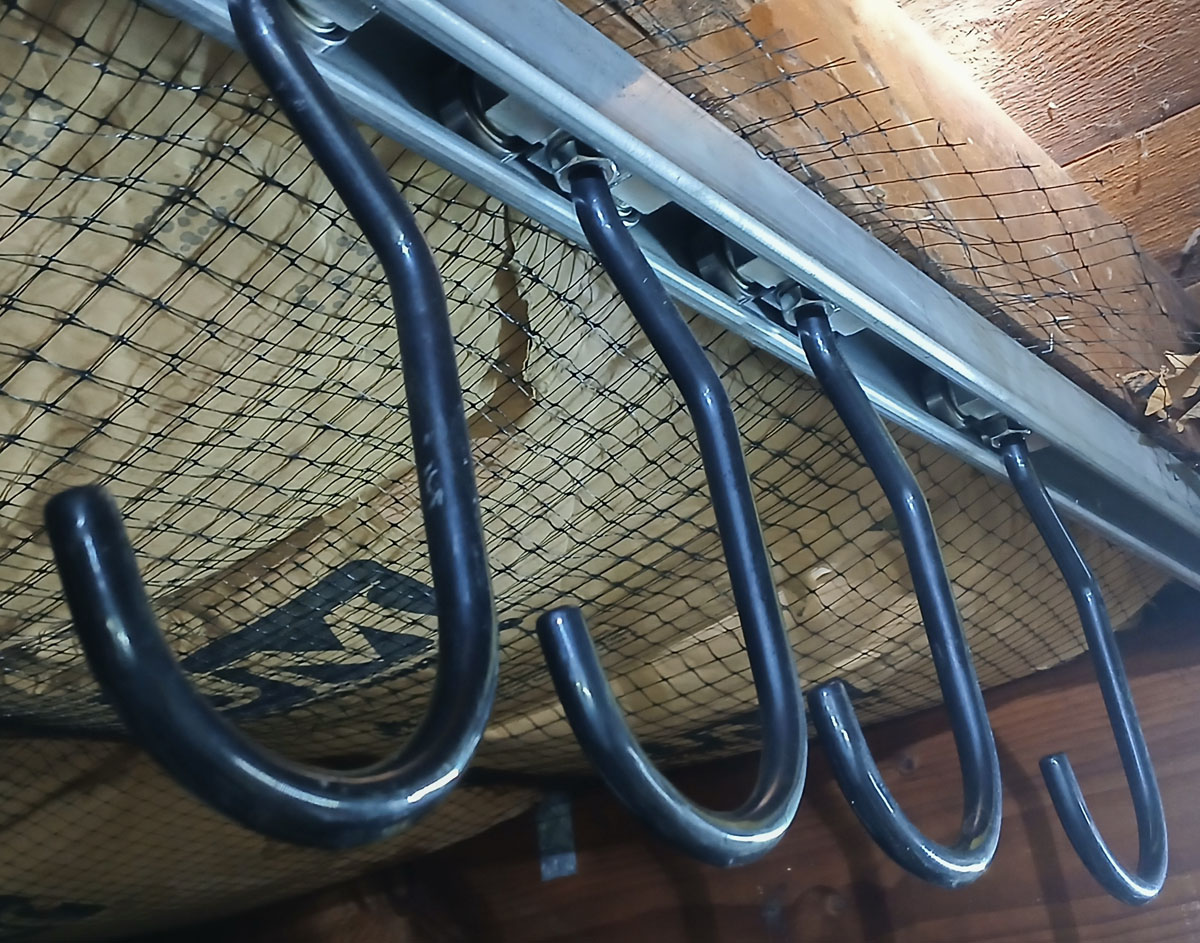
Strut
Typically, some sort of hanger for the Unistrut would be used, either via all thread or directly. My basement situation is a bit different as I need to keep things as high as possible in my basement. I’m going to use un-slotted Unistrut and fasten directly to my ceiling joists with some 0.201″ self drilled holes.
The screw will clear the cart and the rail will be as high as possible. The real problem with the carts and Unistrut is not having the mounting effect the cart travel. The 30mm bearing wheels use most of the inner height leaving very little for broad washers covering the slots. Even a large burr from the sides will cause issue. Treat this all with care.
That’s why I used the solid rail in many of my locations. Unistrut P1000 – 1-5/8″ x 1-5/8″, 12 Gauge Channel, Metal Framing Strut, Solid. P1000SL would be nice if I were hanging via 3/8″ all-thread. There are a number of options depending on your scenario. Eaton’s B-Line is another brand that is common and interchangeable.
UniStrut or B-Line strut is widely available in most electrical contractor supply stores or even Home Depot/Lowes. Shop around. You may find a bit of this in local salvage yards as it’s used in many industrial applications.

Stops!
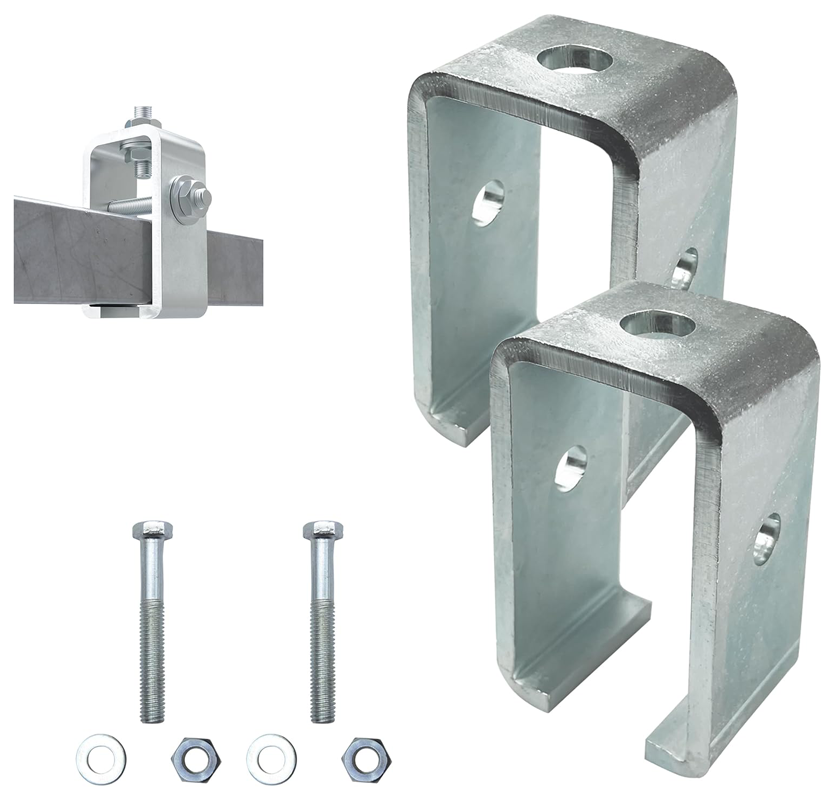
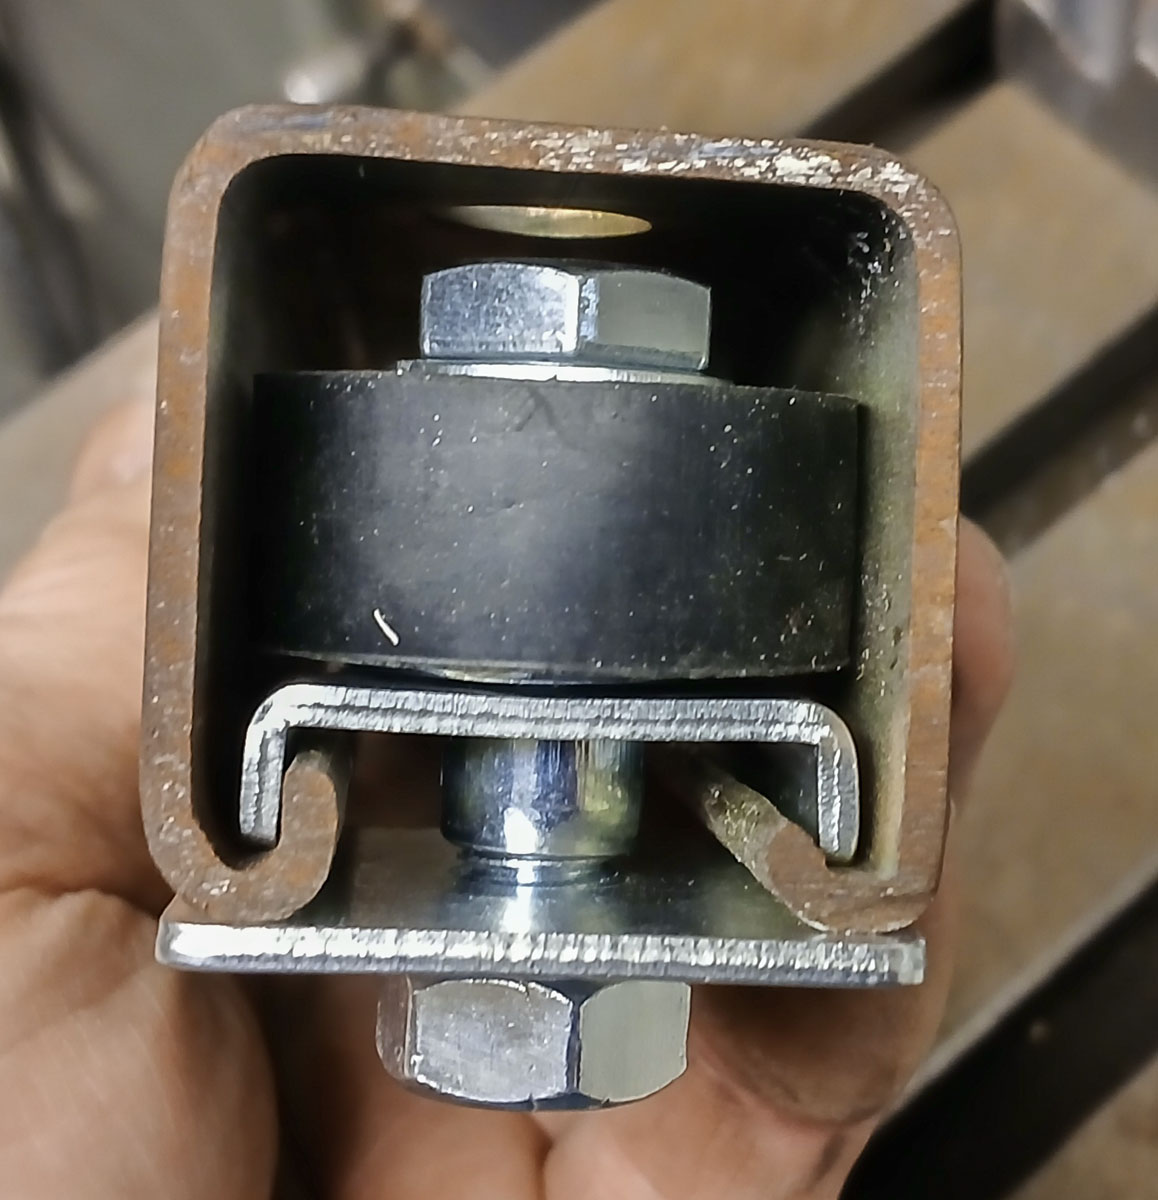
The low cost rail stops are getting hacked to be more secure and able to have a flush rail. That requires a M10 T-Nut in between the clamp and the rubber bumper. Take the straddle clamp plate and press in the nut. Simple. Now the cheap clamp is super strong. Easy. No metal cutting. The bolt could be swapped out for optimum setup but it’s fine with the stock nut.

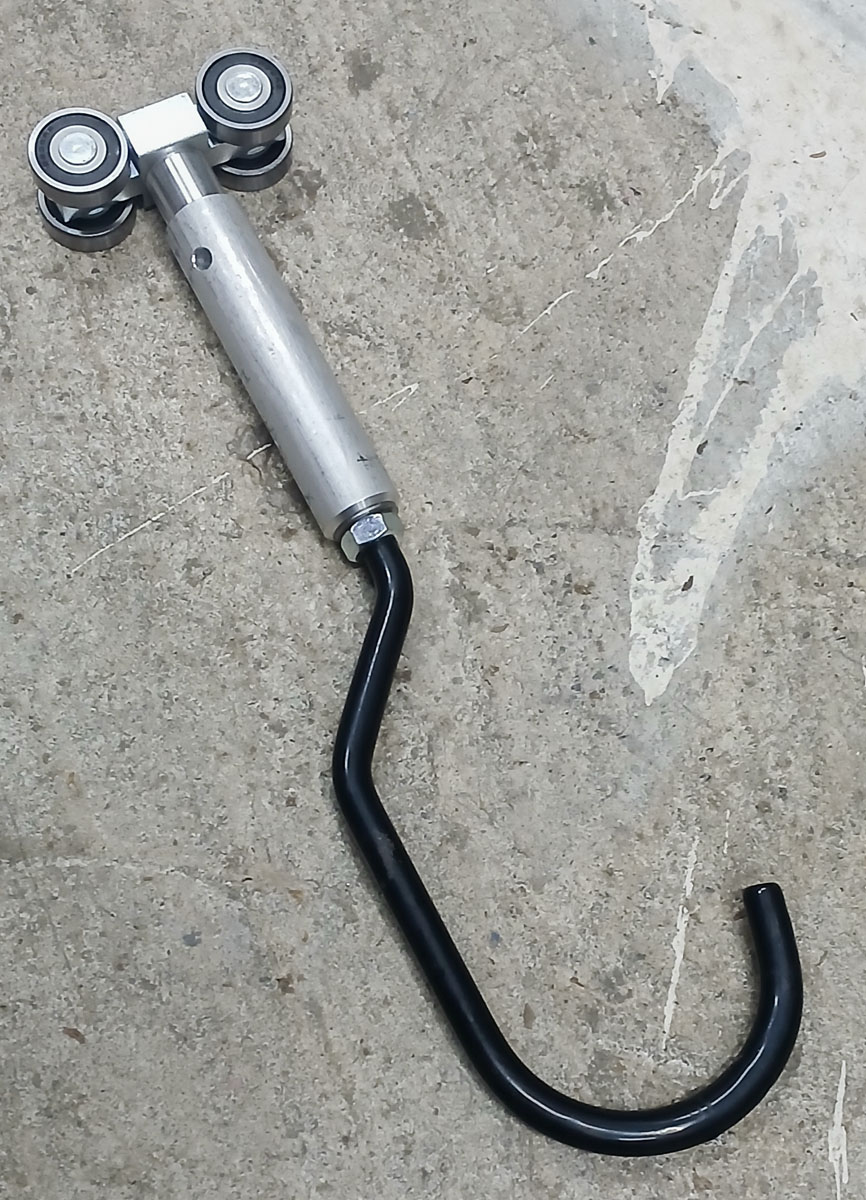
Hooks!
Now we choose the hooks. What’s important here is that we are using hooks with machine threads rather than wood threads. Luckily, Park Tool makes them in 3 sizes. For general mountain and all-road bike, the Park 470 is the way to go. That is threaded M10. For road, the Park 450 is fine. That is threaded M8. Sadly, there are few other options in the marketplace.

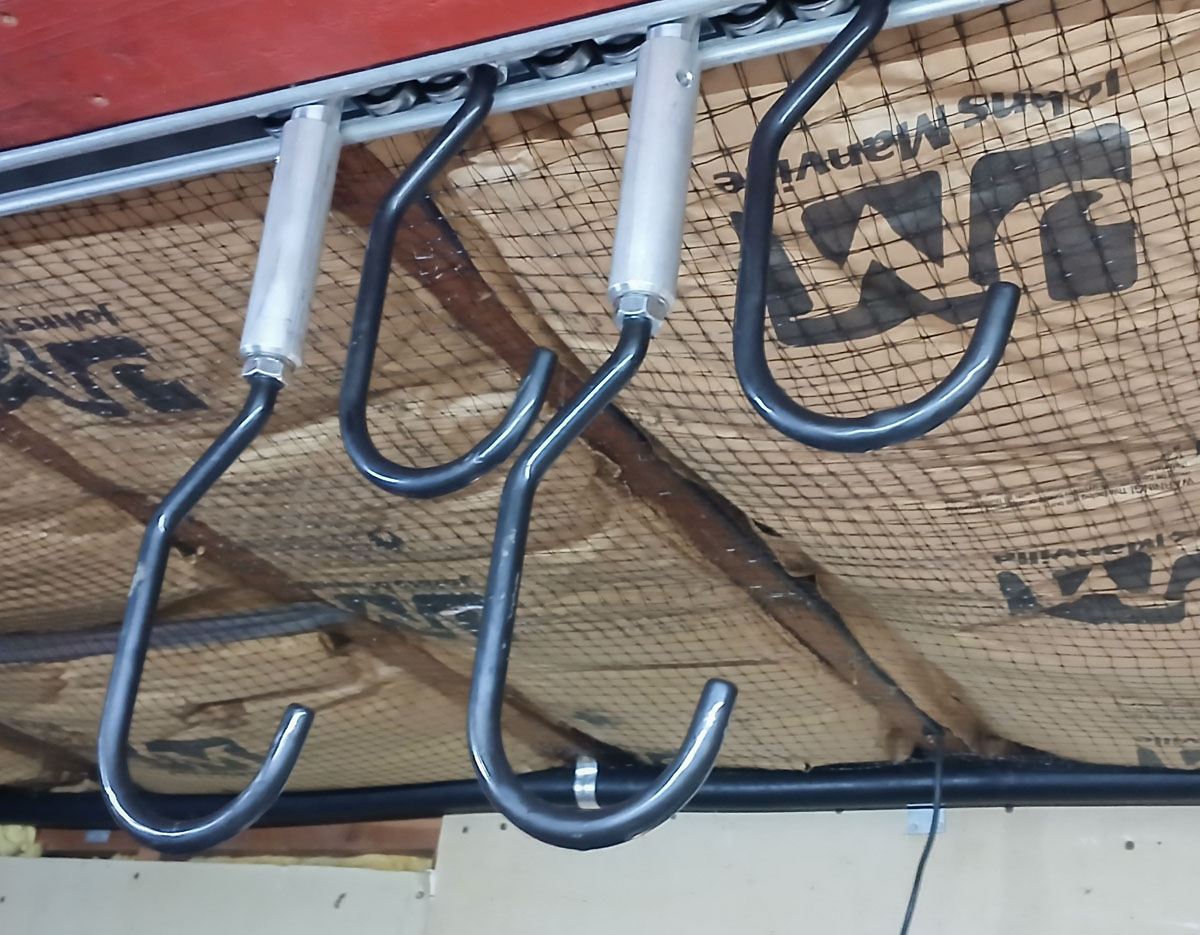
High and low.
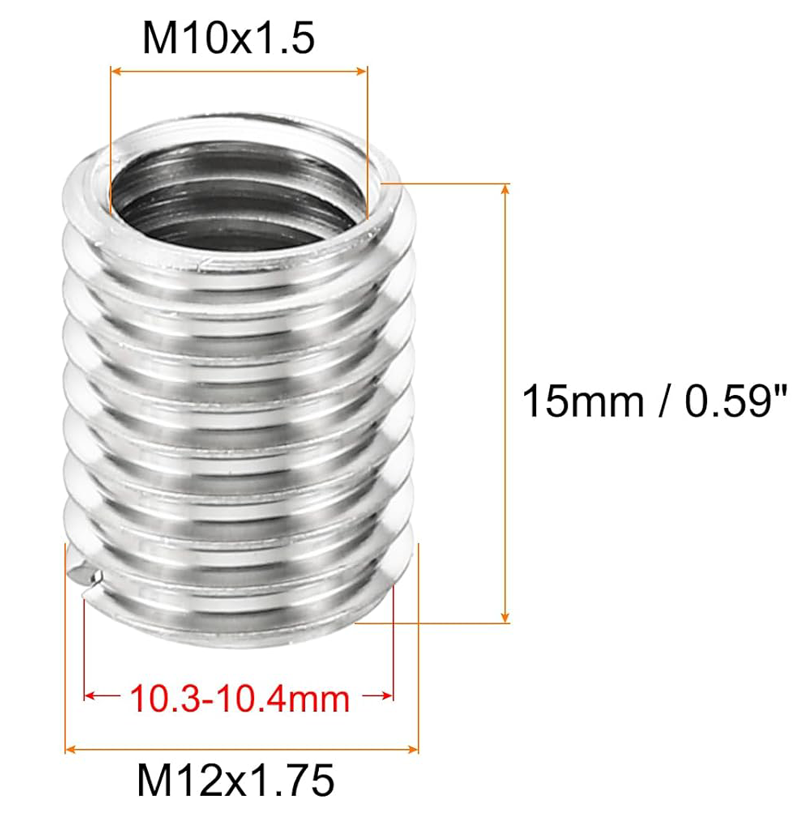
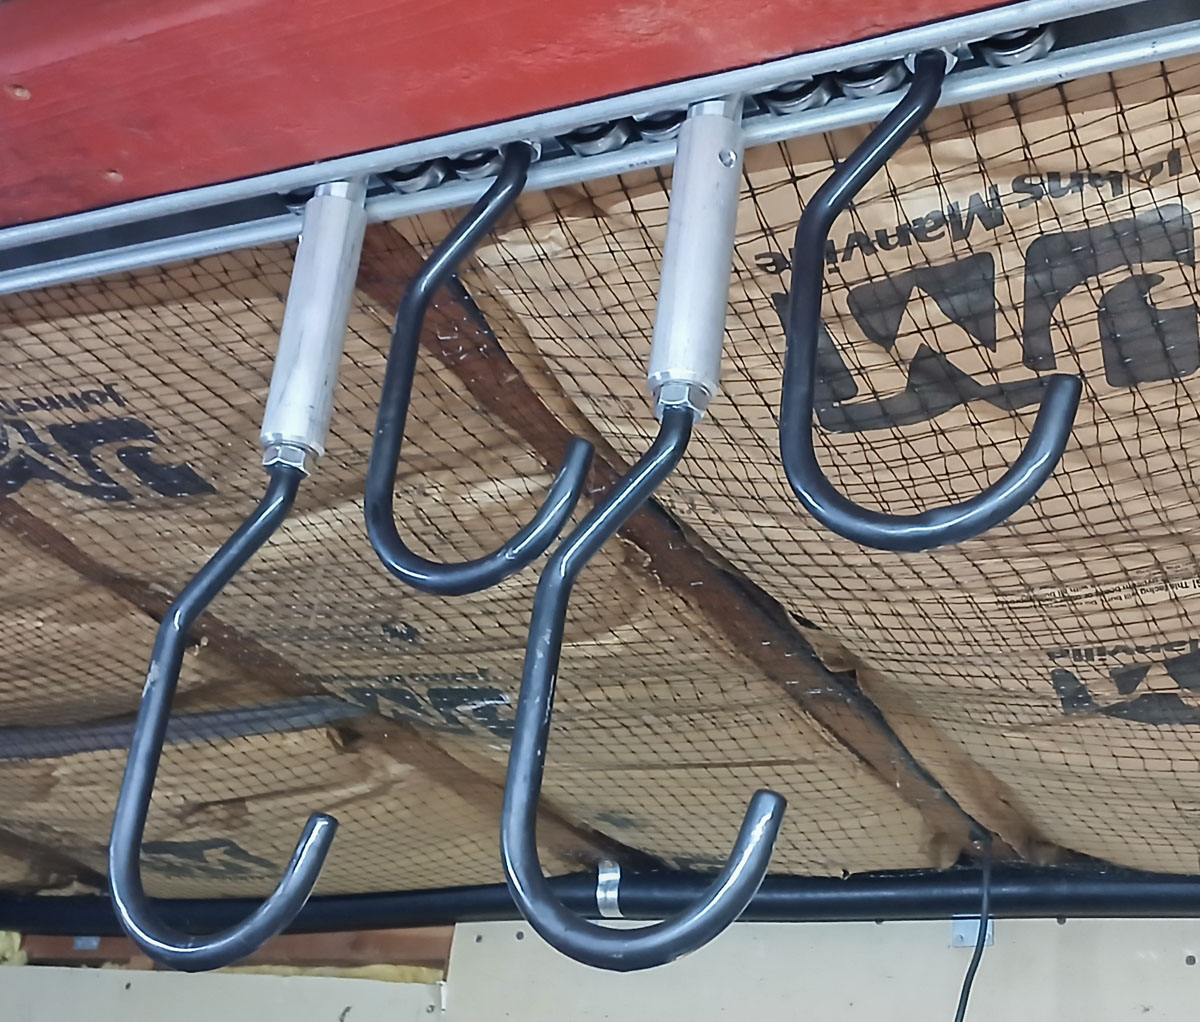
There is one more improvement coming up. Something suggested by a reader on social media. An extended hook mixed into the lot will give room for bars to overlap. This will eliminate the difficulty hanging, removing, and packing the bikes in. This is as simple as a 12mm threaded lug and a set screw. Then I can add 5.0″ or so to lower the hook. I’ll make a few of these and see how it goes.
I use a M12-1.75 x 30mm set screw and a dual threaded section of 1″ round aluminum (trimmed narrow at the rail) to extend the hanger. I decided to do a M10 thread on the other end for convenience. It’s stiff and easy. Here, I use a 5.0″ section to lower every other hook.
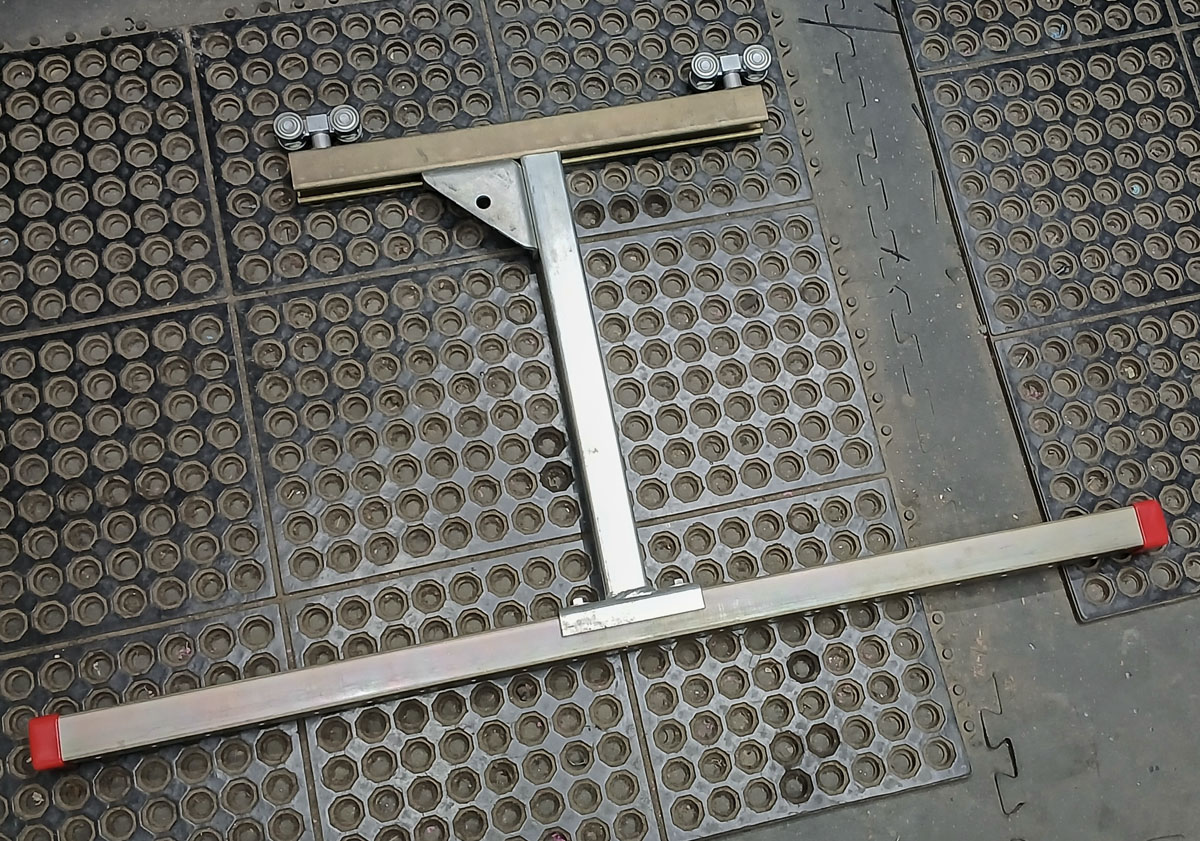
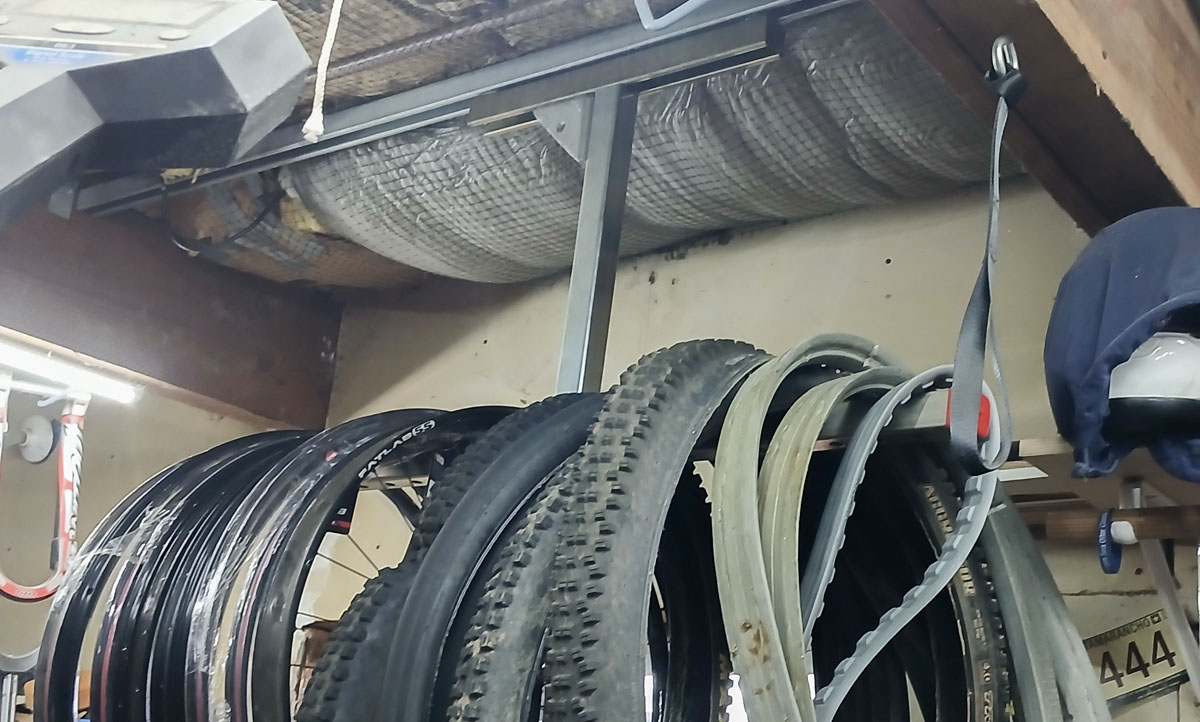
Tires and rims.
It can be helpful to have a sliding rack that stores your rims and tires. I have a few of those in my basement and more in storage. I can hang them over a work area when it’s not in use. Then bring it over while I’m accessing parts from it. Maybe a bit superfluous but learning the system gets us to see these things.
Because this hang can induce a pretty big moment on the shuttles, having a pair spread out really helps. A single shuttle wants to jam.

You can get as complex with all of this as you like with connected and intersecting rails and alternate shuttles. My situation ended up being pretty basic. I’m going to add some other types of shuttles to hold my rims and tires out of the way. It’s hard to see a big change in my basement now but now that a system is in place and rail is going up, things will get better over time.