When I first put Windy’s new road+ bike (the Electra) together, a lot was going on. Finishing a bike project is a messy undertaking. Several details had to be left in an early state of development for expediency, just to move on. One of those that was left for later was the dropper lever.

Using a MTB lever by the stem clamp is not the correct way to control a dropper on a road bike. It is a quick and easy way to get ‘something’ up and running. No messing with tape or other controls, just bolt it up. It may be fine for tourists. For sport use, taking the hands from the bars to get to a lever while riding in anger is neither safe nor smooth. A dropper needs to be actuated easily and quickly in the heat of battle. Waiting at your fingertips. Thus, from the drops or hoods.
There exist several after market levers that attempt to solve this problem when setting up with drop bars. I have many and attempted to assemble Windy’s bike using a few of them. None worked. Sure, they ‘could’ make a dropper move but all of them left the rider with either compromised hand holds or compromised control. These are terrible products and a waste of money.
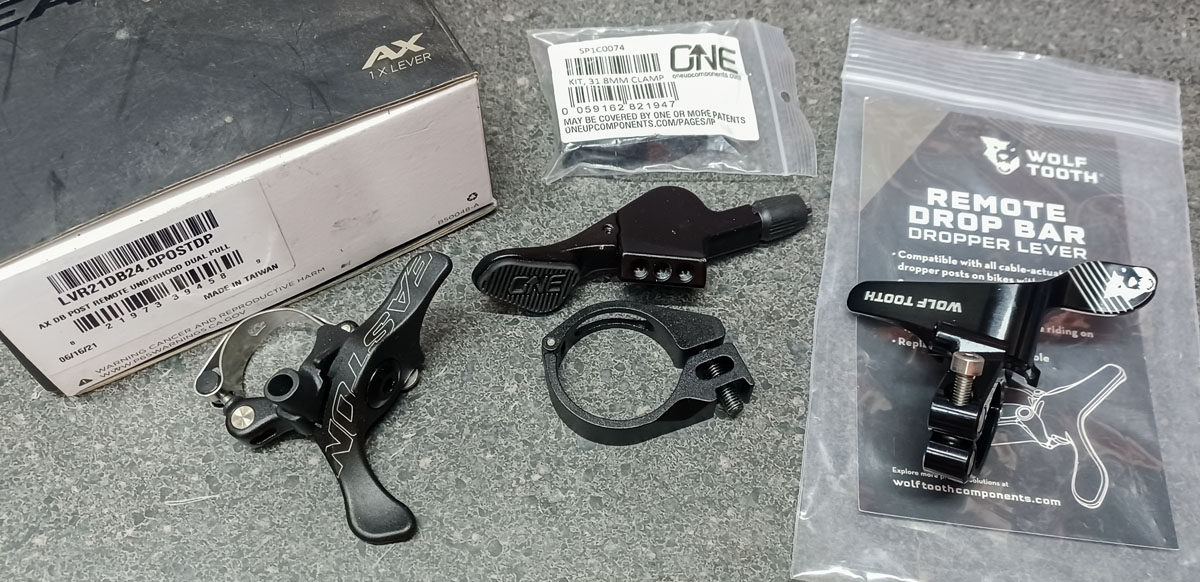
Years ago, we could just hack a cable actuated front brifter to work a dropper. Even though those were early days, it turns out that that is really the best and only correct way to perform this task. Control must be through the brifter lever. Those days are gone and using a very old brifter on the left with new shapes on the right is unmanageable. We can’t do that.
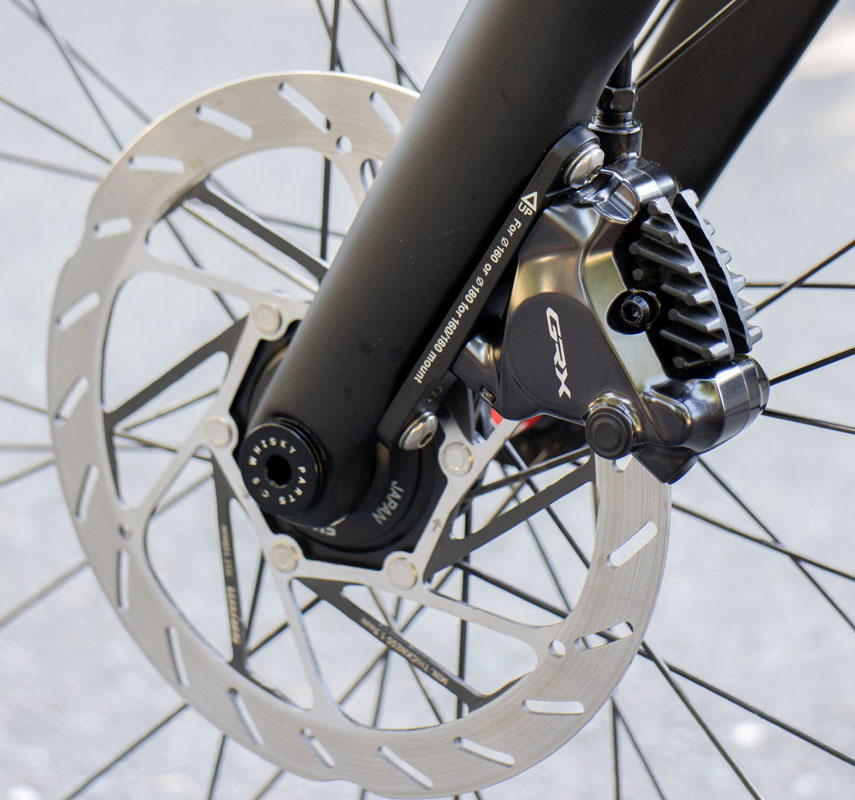
When setting up Windy’s bike, we used a SRAM Apex Disc Brake DB-APX-D1 (00.5018.226.001) for the left/front control. It would have been so nice if SRAM had produced this part with a lever option for dropper use. There’s even ghost pin supports in the casting for something. But no. This is insane as this is such a simple thing that is needed from anyone buying the SD-APX-D1 (00.7018.531.000) X-actuation (12 spd MTB) shifter that matches it on the right. If you’re using an MTB rear derailleur, chances are you’re going to want a dropper post also.
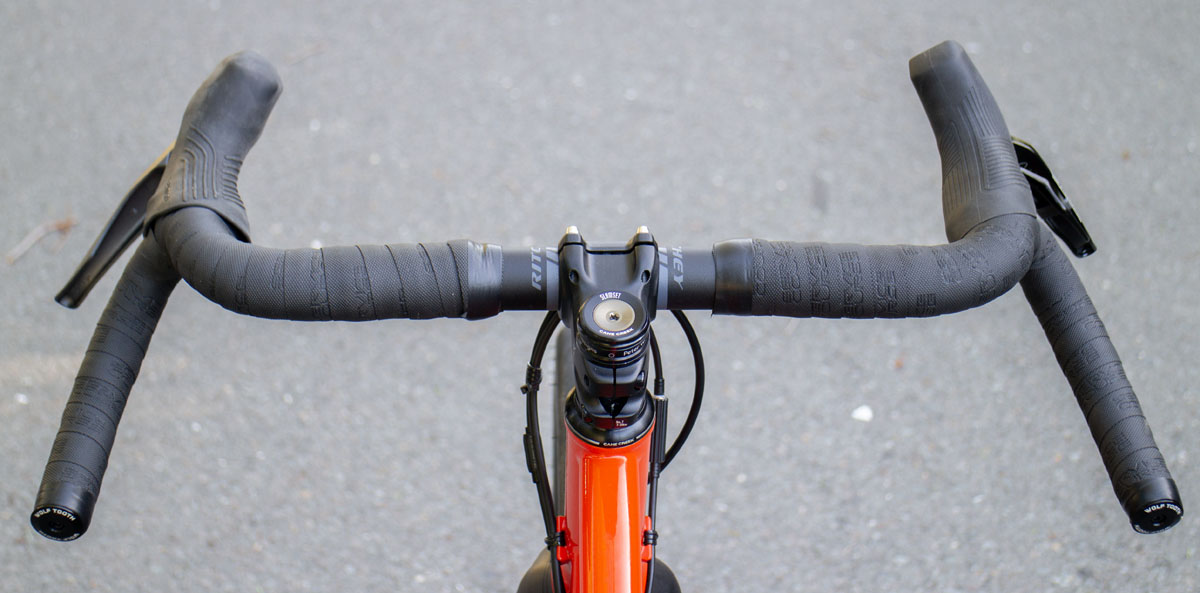
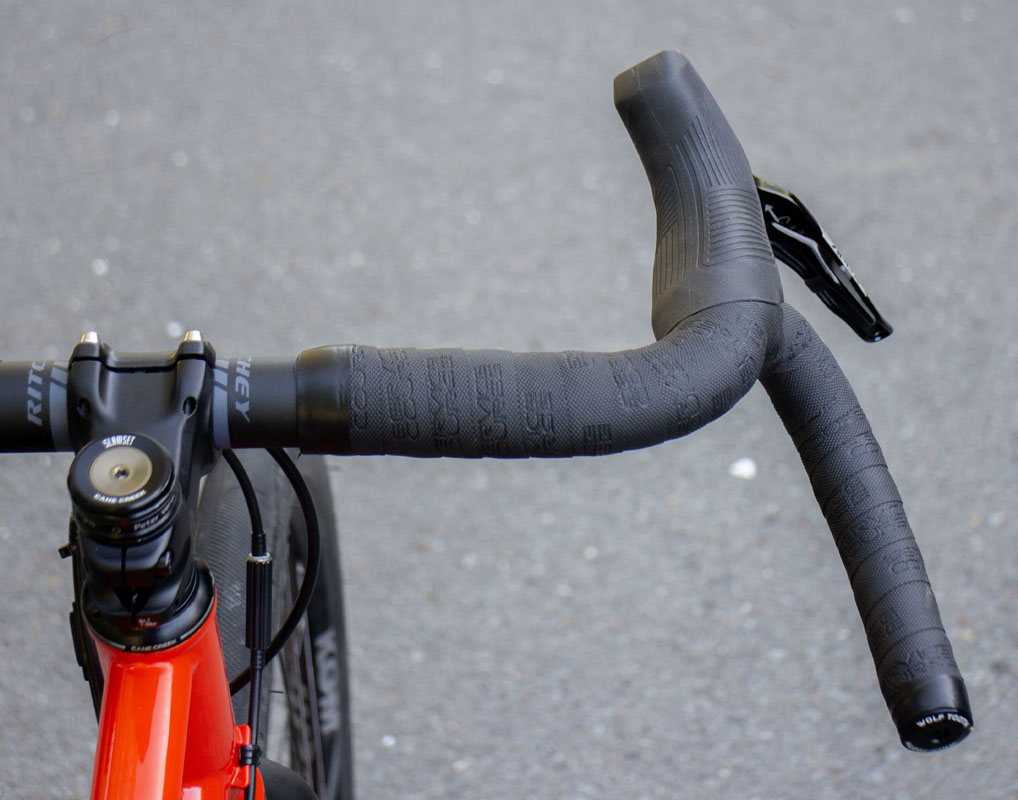
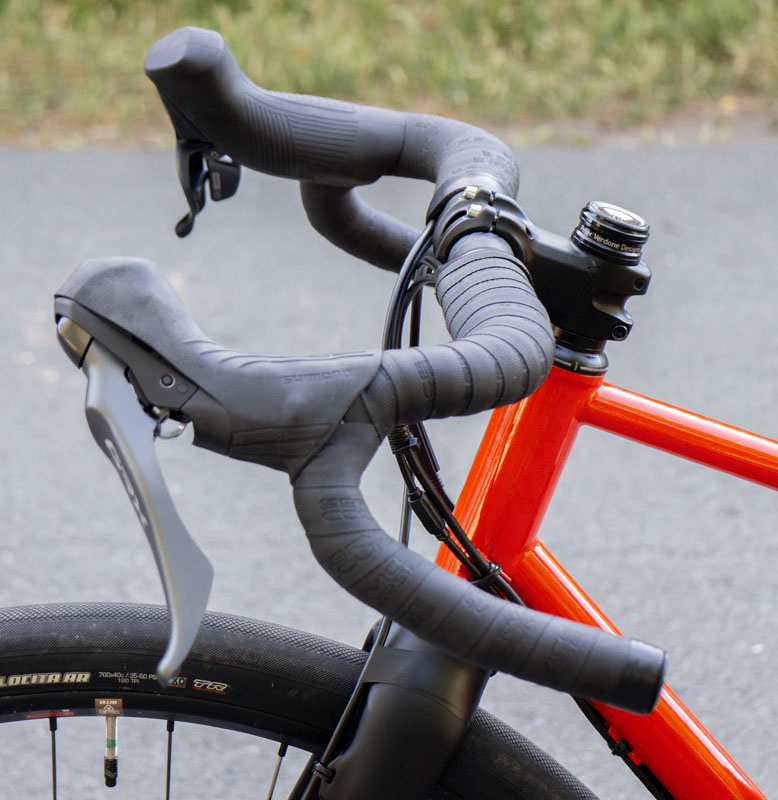
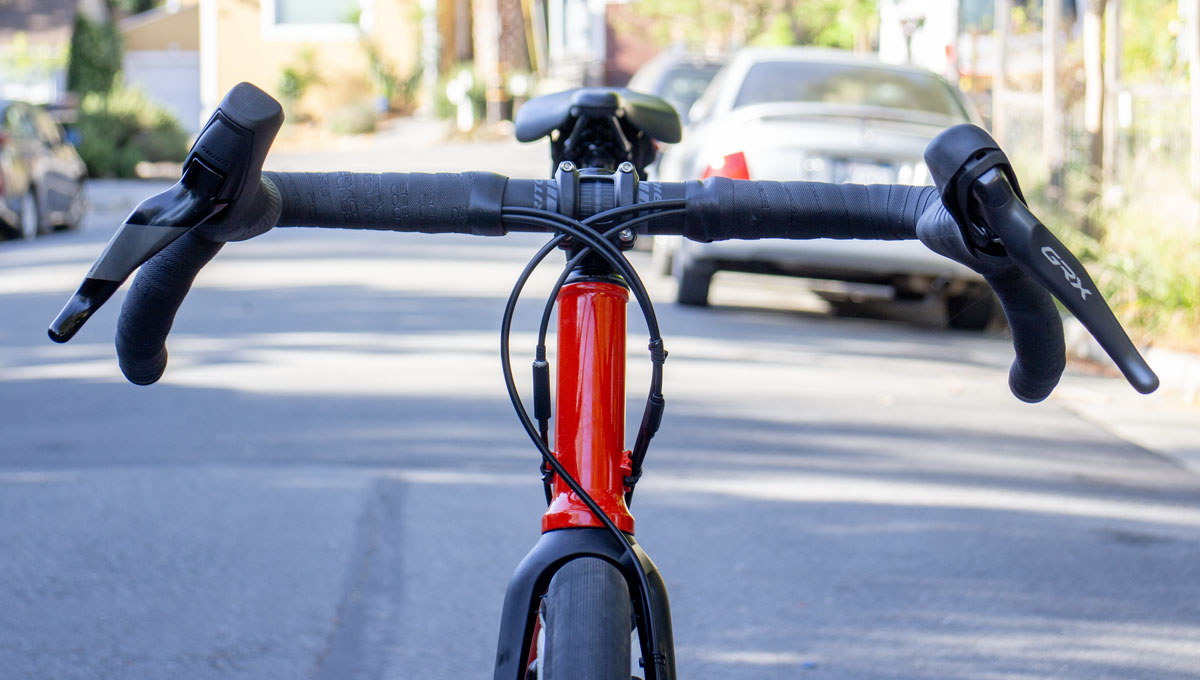
After hedging for a few weeks after the build, I was finally forced to go with my last desired option, switching the control to a GRX ST-RX820-LA lever and caliper (parts). In retrospect, I should have just gone with the full GRX820 drivetrain and brakes. The GRX RD-RX822-GS/RD-RX822-SGS would work with a 10-45 or 10-51 cassette respectively. In my defense, I have a hard time using a 2x/3x deraillure when in a 1x configuration. That’s what X-horizon is for. That pushes me to SRAM, not Shimano.
Just a note that the metal pads for the Shimano GRX 820 calipers is L04C-MF. The resin pads are L05A-RF. The olive and connector insert on both ends are BH90 (Y8JA98020).
So, we’re going to mis-match brifters and brakes! It sounds terrible but luckily, the geometry of the Apex D1 and GRX-820 brifters are fairly similar and it’s not the worst look in the world.
I prefer the shape and feel of the APEX over that of the GRX. It’s subtle in the hand but the feel of the hydraulics is much better.
It has been a while since bleeding my last Shimano drop bar hydraulic. For this setup, one of the hydraulic bleeding Funnel adaptor (Y0C698050) was needed at the master cylinder. A TL-BR002 Funnel Unit (Y13000090) would have done also. It wasn’t an easy bleed as the slave side of the system shows up dry. I’m hoping that a second bleed after riding finds that last little bubble that I imagine is in there to give a more crisp feel.
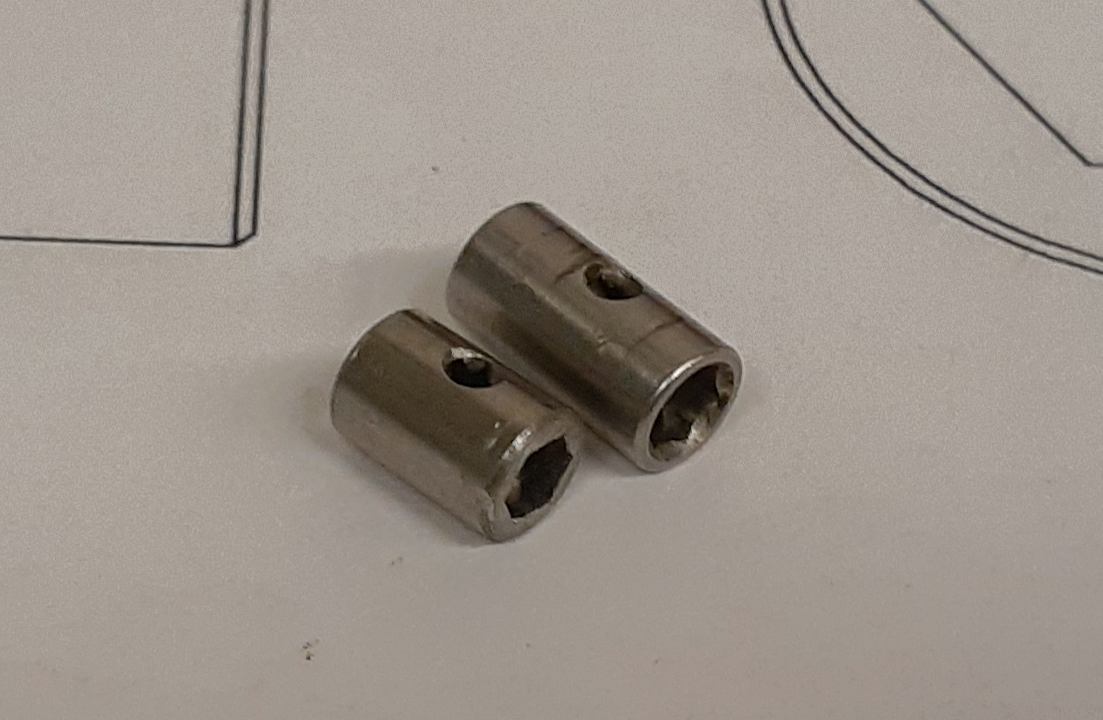
Since we are effectively using a reversed cable run for the dropper post, the termination of the cable will happen at the dropper, not the lever. For this setup, a special knarp is required. A modification to a Kind Shock P5713 cable clamp. Old tricks for new bikes.

Installing this setup is one of the most barbaric assemblies that a bicycle mechanic will do. The bars or levers need to be removed to provide slack in the line to remove the seatpost and connect the cables. Then the post is inserted while bringing the controls back into position. It’s hateful. I do this as infrequently as possible.
Of course, and inline tension adjuster is needed to get the lever to work on point. I ran out of my fancy Jagwire Pro Mini Indexed Inline Adjusters (BSA062) and was forced to use an overly large generic. I hope to replace this when I install the new bars.
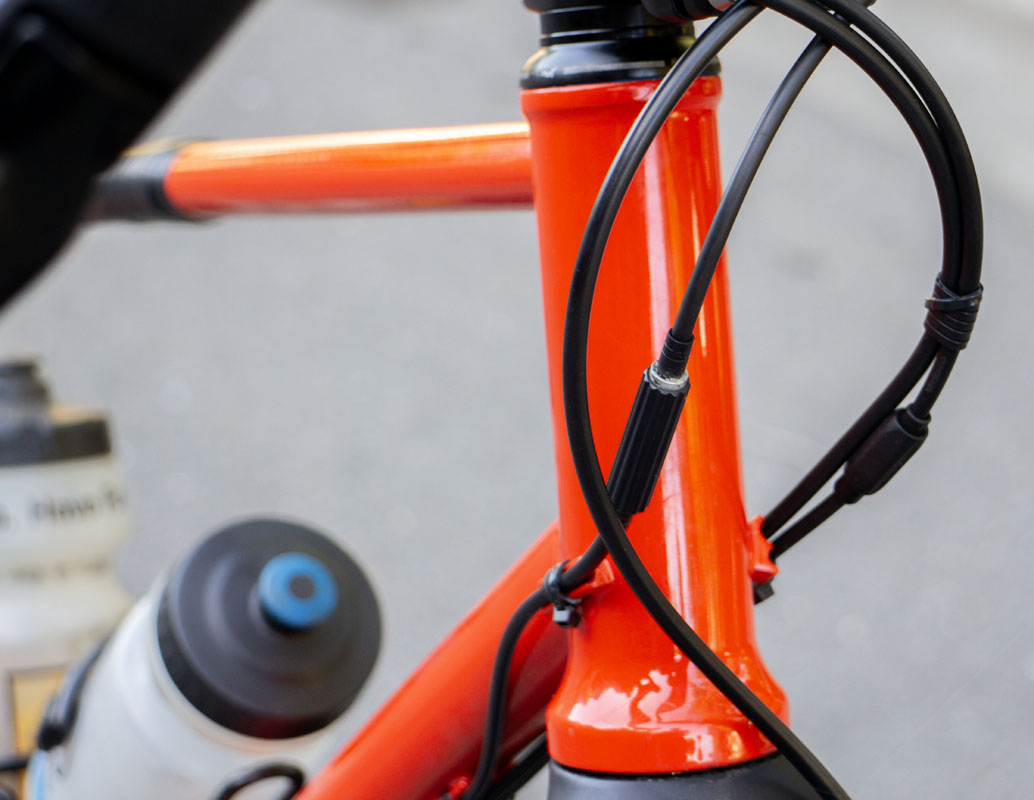
The brake hose was left slightly long. We are expecting the bars to move up slightly when we get the new bars (Whiskey Spano) in a few weeks. Current is 85mm drop. The new will be 100mm. This isn’t desired but the shape will reduce the radical and useless flair now. Thus, bar tops may move up 5-10mm.
Giant Bicycles seems to make a special coupler for exactly this reason but it seemed to be a challenge to get one in the United States. I need to look into this more. GIANT Cable Connector for Shimano GRX to Dropper Post – 1639-CBLCET-0001. I’ll be doing more research on this in the next few weeks.
![]()
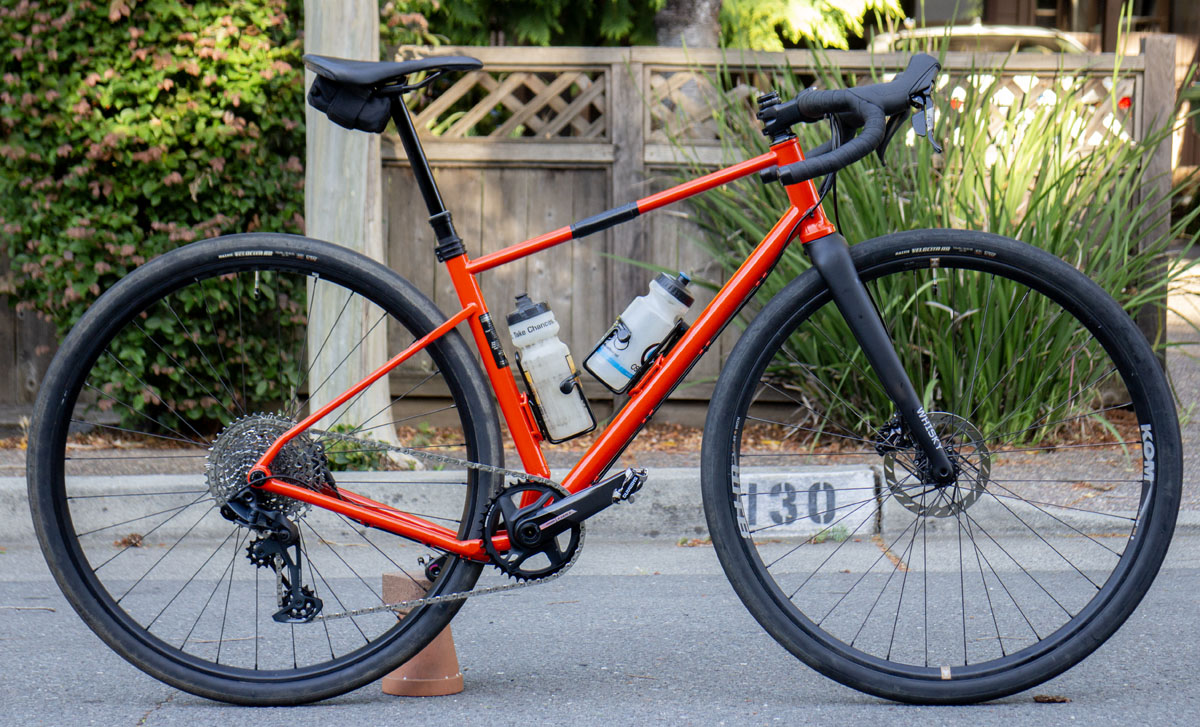
The end result is a much cleaner and sensible setup. The bike now works as it should. I’m not super happy with the GRX hood covers. They don’t lock down in place well or easily. The stroke length of the GRX is very long compared to the Apex. The Apex is clearly nicer hydraulics for braking. Additionally, Apex has larger brake pads and a larger caliper for improvements in harsh use.
Other changes shown here since the initial setup:
- Whiskey No.7 MTN Stem – 60mm. Rectangular section for improved structure and looks.
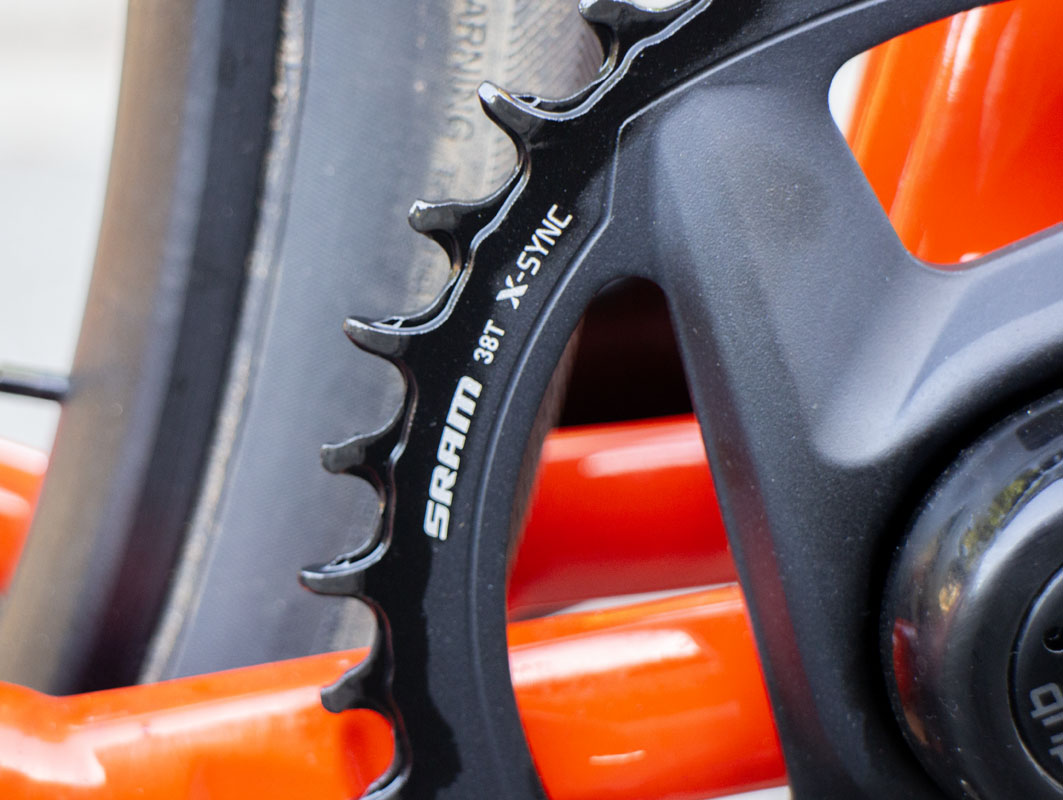
- SRAM Rival DM 38t chainring (from 40t), 6mm offset. Gearing is more targeted to how Windy is using the system.
- Two water bottles. Duh.
- Bag moved from frame to under saddle.
- Wolf Tooth Alloy Bar End Plugs – Black