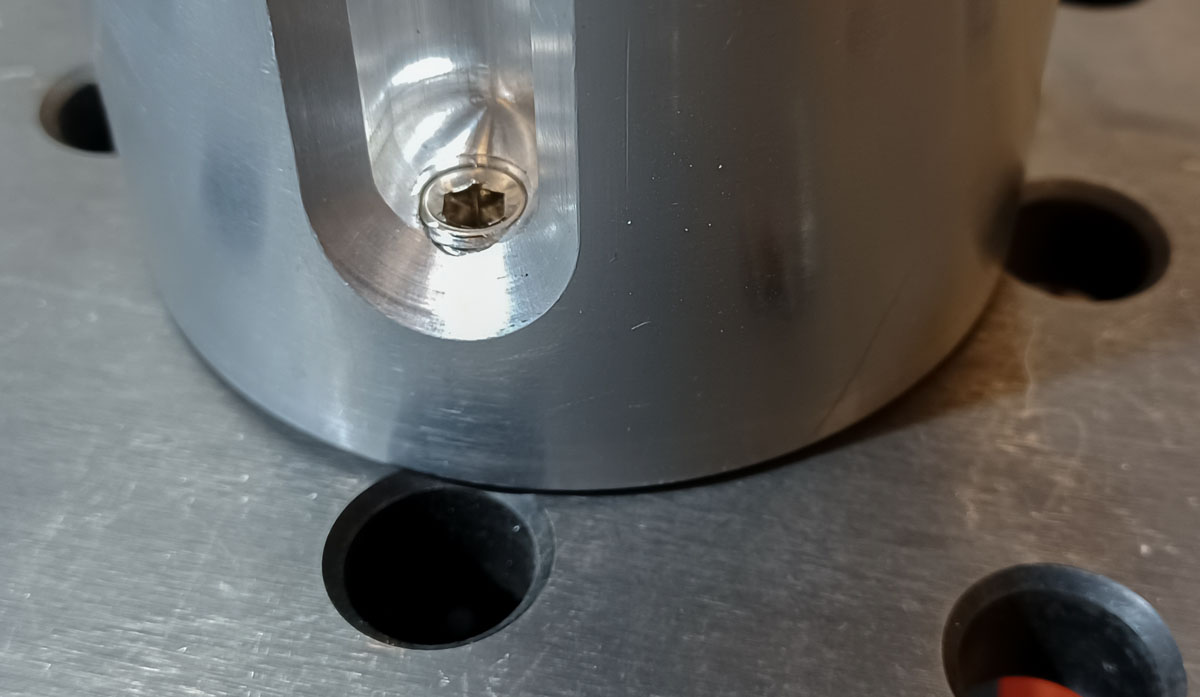
Within the 2024 PVD Samantha Frame Fixture, I designed a way to calibrate the crank shell and axle towers. The tower axis needs to be orthogonal to the plane that lays out the frame over the fixture table. While pretty important for the crank shell, it’s crucial for the rear axle axis. How do we do that?
Obviously, if the table top is flat and parallel to that plane, then we can use a spirit level or digital protractor to measure the shaft as it relates to that surface. But how accurate is that? To what level of precision are we really working with? It turns out, not very.
There is a better way.
I had an idea. If a laser is mounted to the tower shaft, it can be spun about and it should have the same measure from the table at any given radius. At all radiuses if that laser is also parallel to the the surface. Because we are now using a laser disc of several feet in diameter to measure rather than just a very small section of shaft, we end up with a much higher level of accuracy. This can work for the crank shell tower as well as the rear axle tower. This is also cheap and it’s easy.

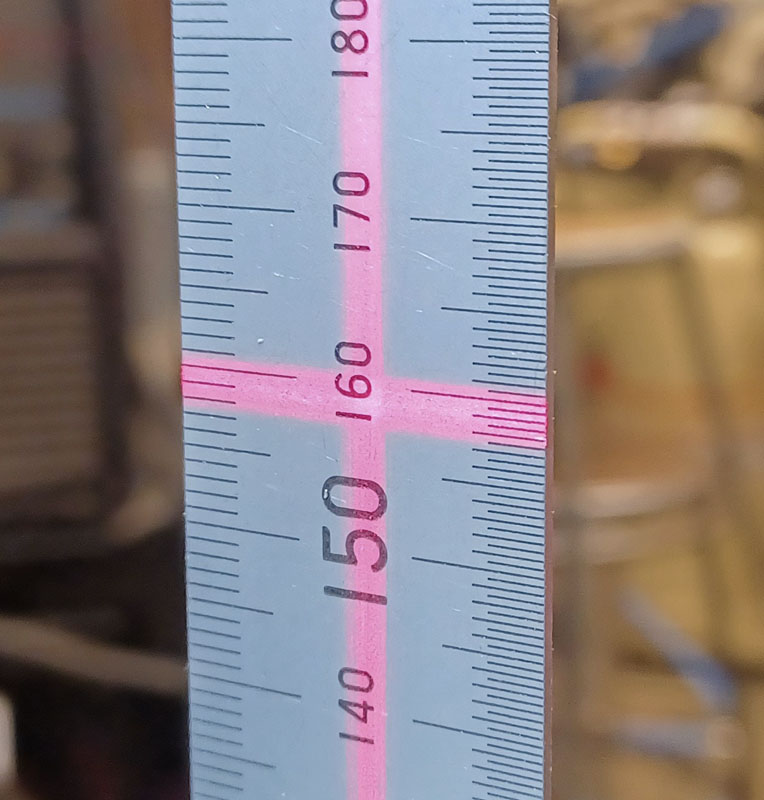
To do this, the laser plane height is measured facing in one long axis and distance on the table, then in the opposite direction. The tower is adjusted until these heights match. This will now be the same height that we will see in any other axis. The laser itself can be adjusted to be parallel to the table so that the same measure is realized at any point on the beam.
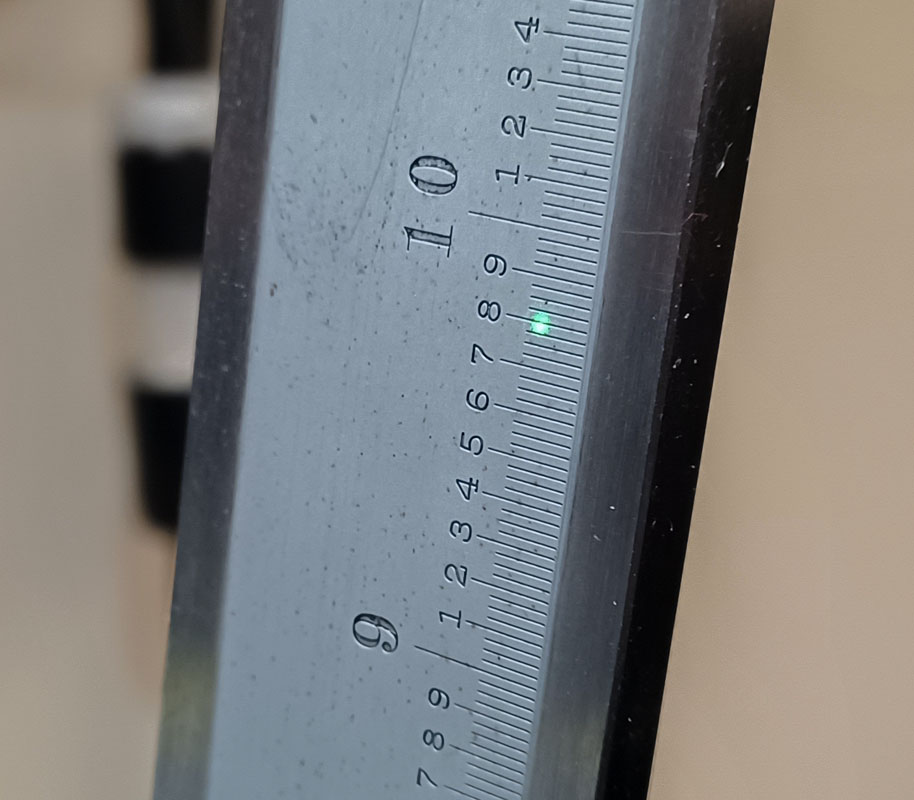
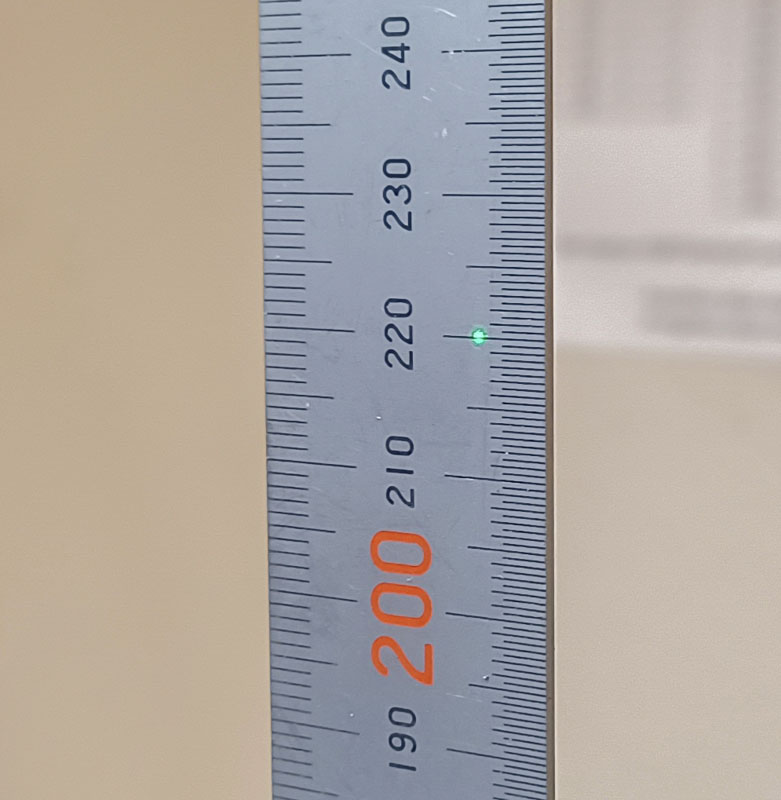
Using this method, it’s instantly clear how to adjust the tower witnessing just a millimeter of deviation at the far corners of the table.
I had to figure out a laser for doing this. I needed something affordable and clutter free. More than that, I needed an extremely small dot diameter so that the measurement would have the most meaning.
Because I have a background with firearms, I had an inventory of rifle scopes, other optics, and mounting parts in storage. I looked there first. NATO rail was an obvious mounting method. I had some low UTG Low Pro LE 1″ Clamps (RQ2W1104). Then I had a few choices to make on scopes.
A 4×32 optical scope (UTG SCP-M4CR5WQ) was attempted prior to ordering a laser but didn’t work. There was no way to focus the optics so close up.
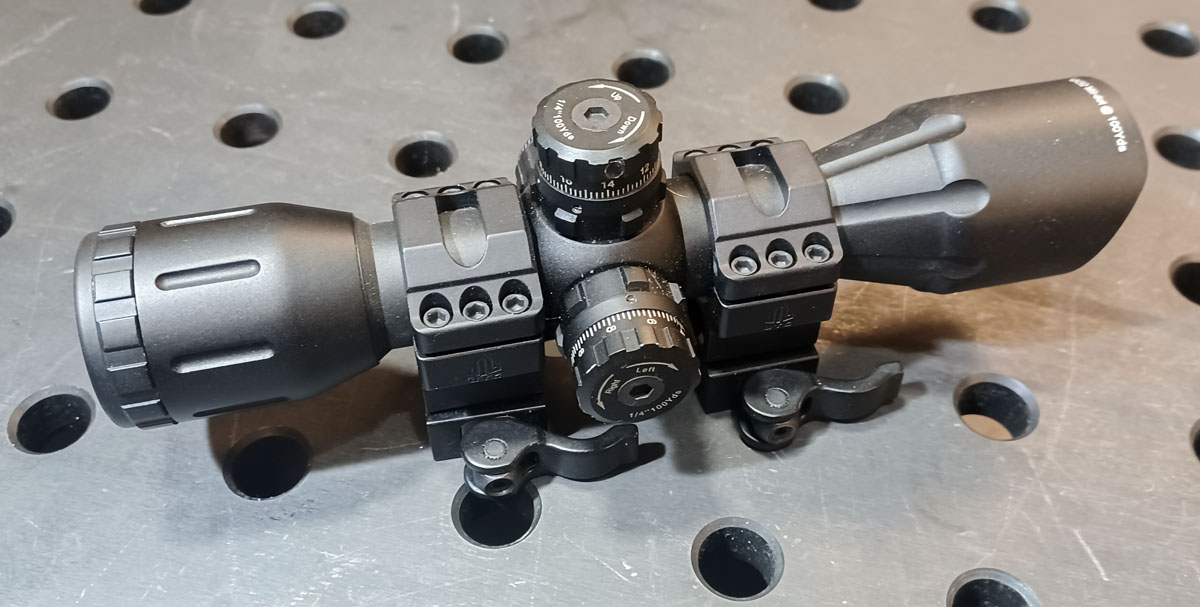
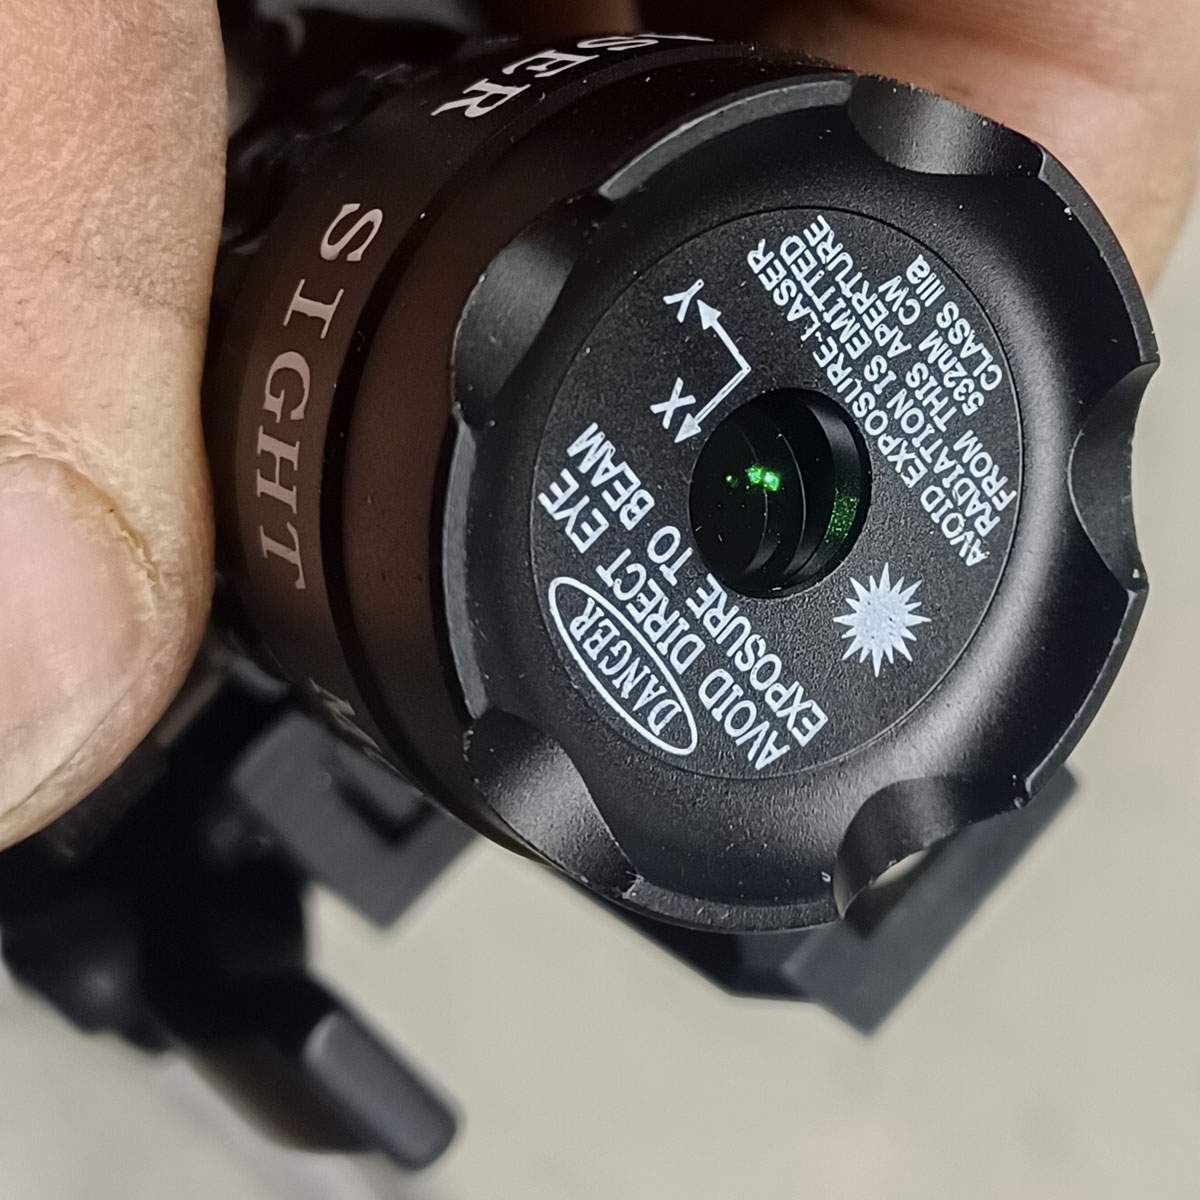
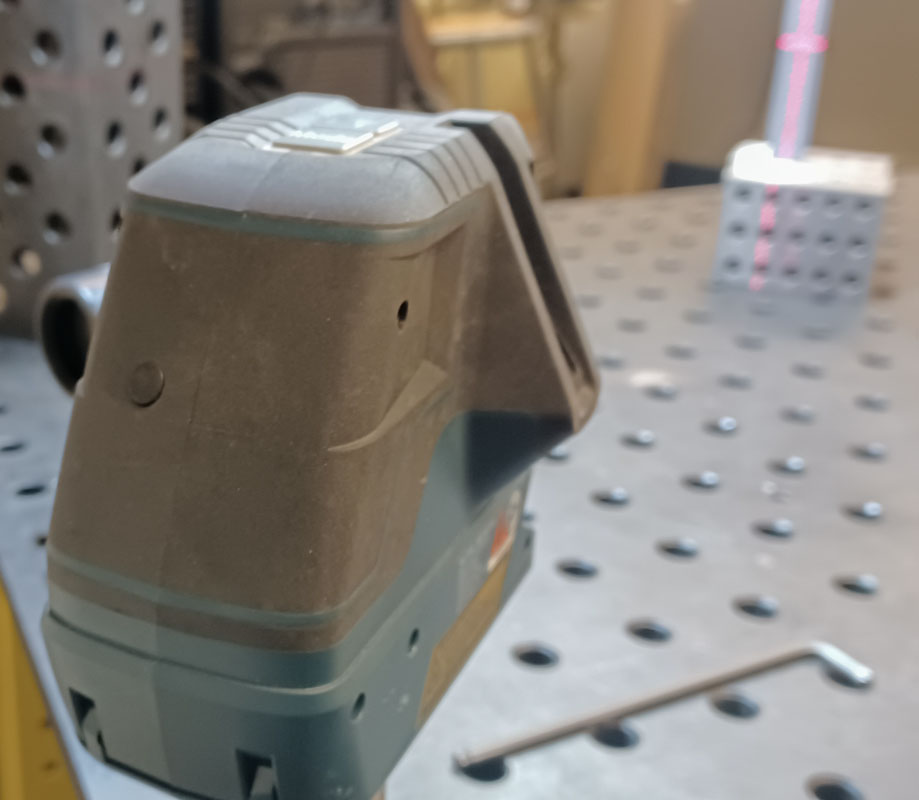
Laser will work better. I ordered an EZshoot Green Laser (532nm) Scope. Just $22.49 got me an incredible tool. The dot size isn’t the smallest and is of an intensity that is quite high. What it was is; compact, clutter free, and very very fine adjustment of exit angle. This meant that I didn’t have to do extremely high levels of precision in machining when I can simply turn a few calibration knobs at the end.

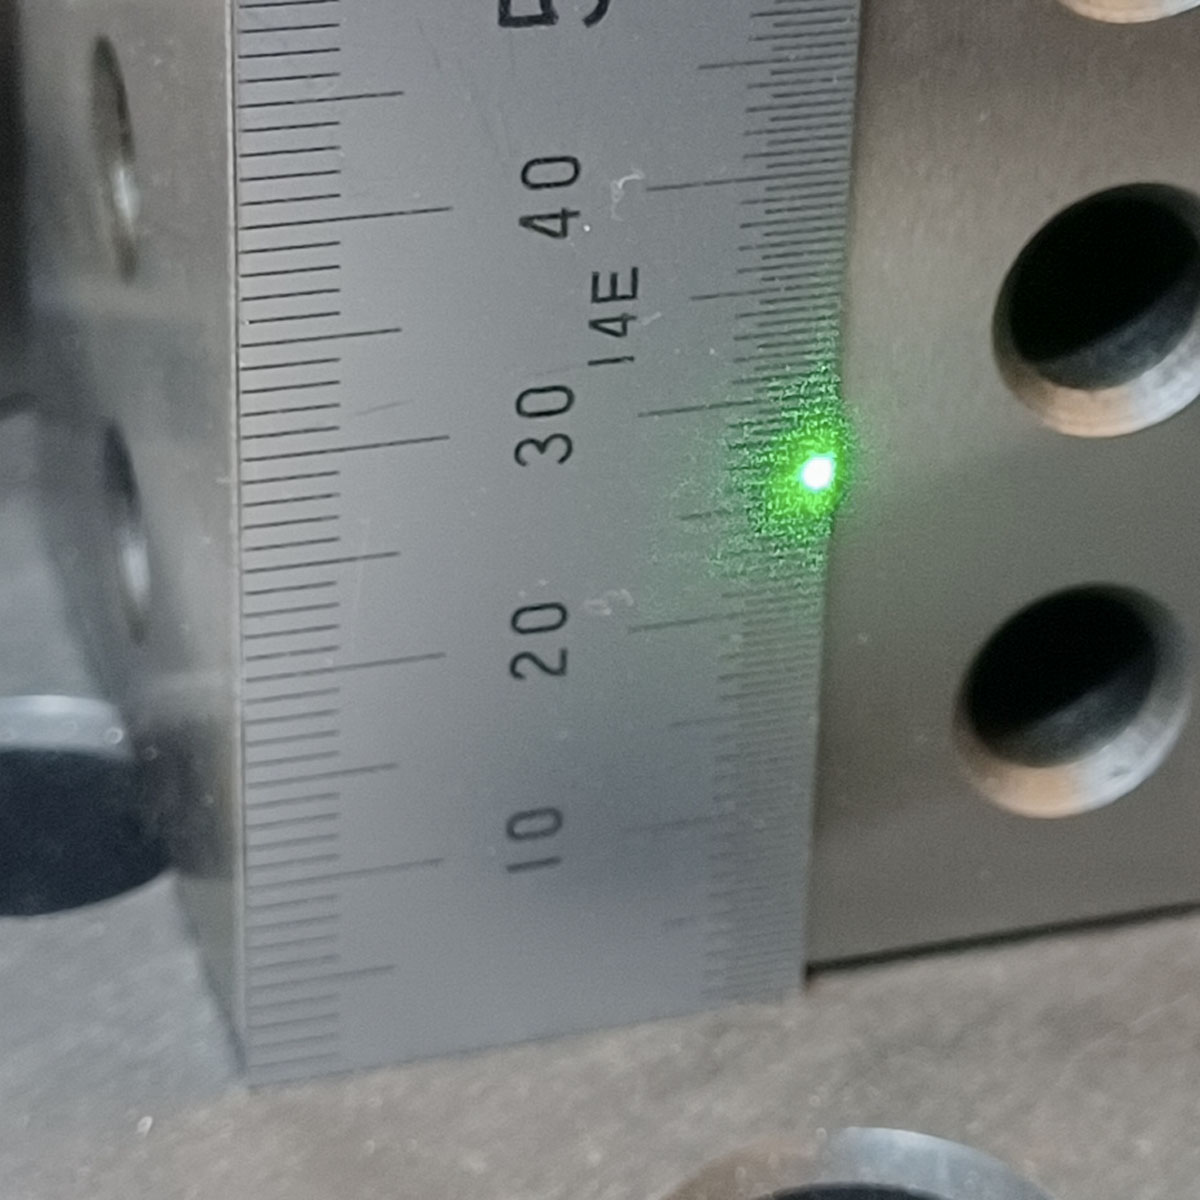
The dot size is about 4-5mm stock. To reduce the dot size, I made a tiny 0.64mm (0.1mm thick) aperture into the system to bring that down to about 1mm. I need to do more work on this detail in the future. An aperture with a laser can cause diffraction at distance, leading to an increase in diameter and softening of the edge.
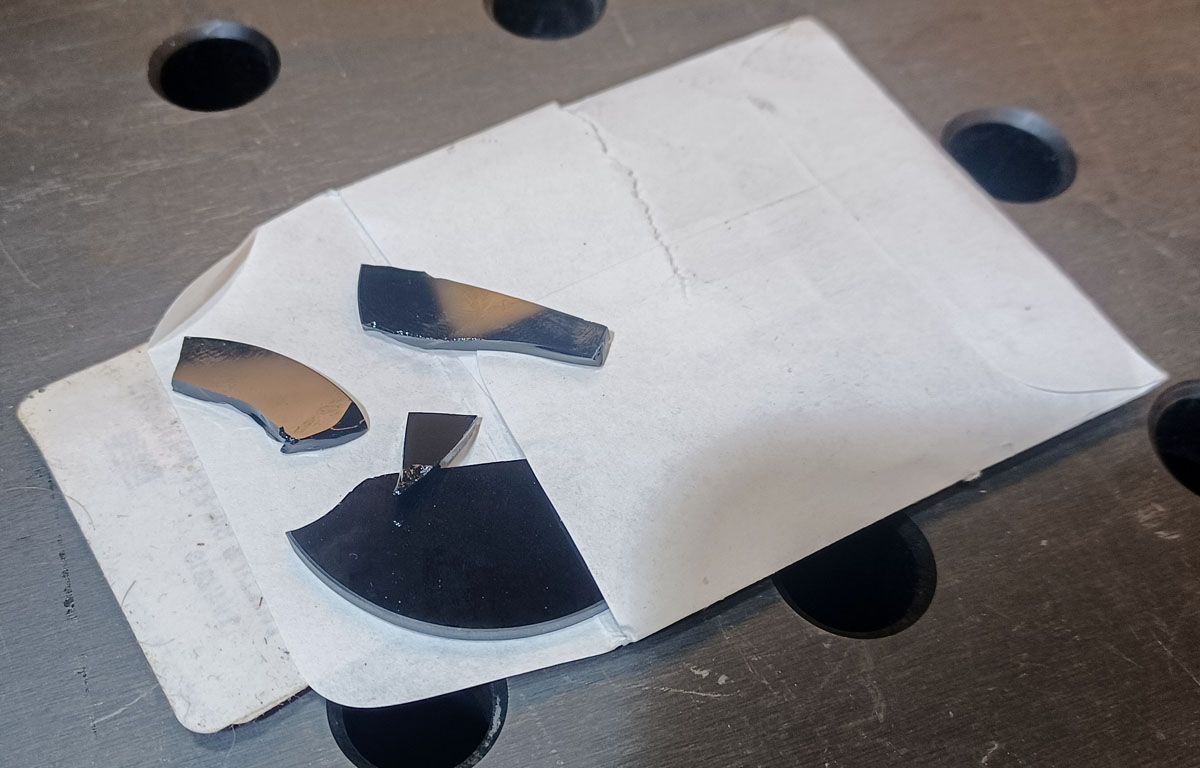
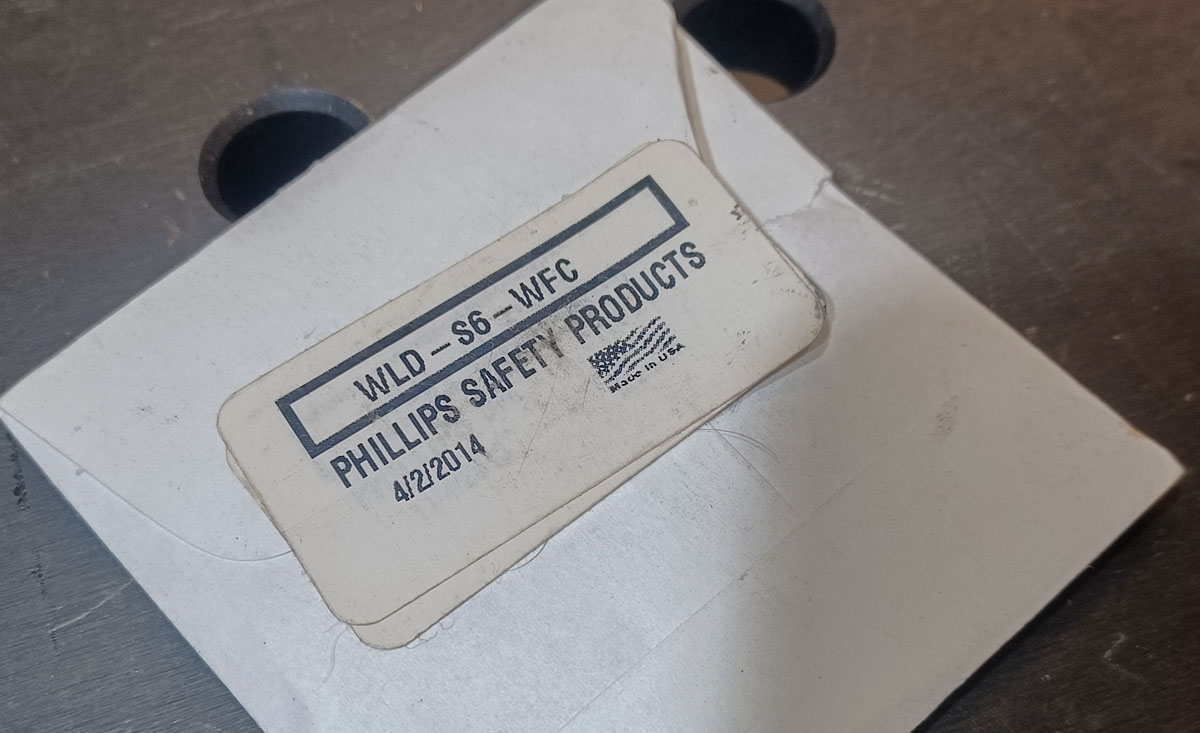
To reduce the intensity, I ordered a 12.5mm ND Filter Grey Glass (Transmittance 0.80%) While I’m waiting on proper ND filter to come in the mail, I used a chunk of a broken Phillips Safety, Green Welding Lens, IR#6, Circular 50 mm. While this was convenient to grab this broken piece from the pile of welding lenses that I had in the shop, it also turned out to be the nicest shade. A #14 shade (the type for viewing an eclipse) didn’t let any of the light through.
![]()
The value in this laser sight is really wonderful but I tried to do better by assembling my own laser system using a Quarton Mini Dot Size Red Laser Module (VLM-635-63-LPO-200) which promised a small dot size, but that’s only at the stated 200mm. Otherwise, the beam is highly divergent and the dot grows radically from that point. It’s strange that it’s so hard to find a good module for this job.
Since this is a 1″ diameter scope, I decided to clean up the appearance and pimp out the tool by ordering some nice optomechanical parts from Thor to hold them. A RSA90 – Right-Angle Clamp for Ø1″ Posts and RSHA – Adjustable Height Collar for Ø1″ Posts, 1/4″-20 Locking Screw. This was an extravagant purchase but it makes the setup so much more pro and dialed.

In the future, I’ll make a nice kinematically constrained 90 degree clamp for the scope but I’m just going to wing it for a bit with the Thor stuff.
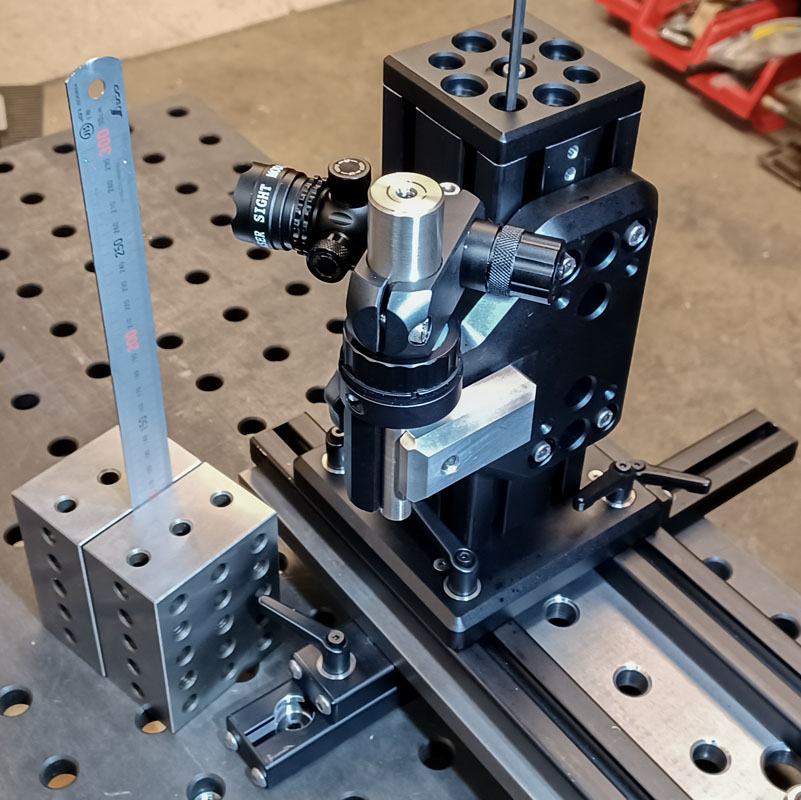
Since I had now solved the calibration of the crank shell pillar, I had to look around at where this could go. This get’s to another cool tool for using fixturable welding table.
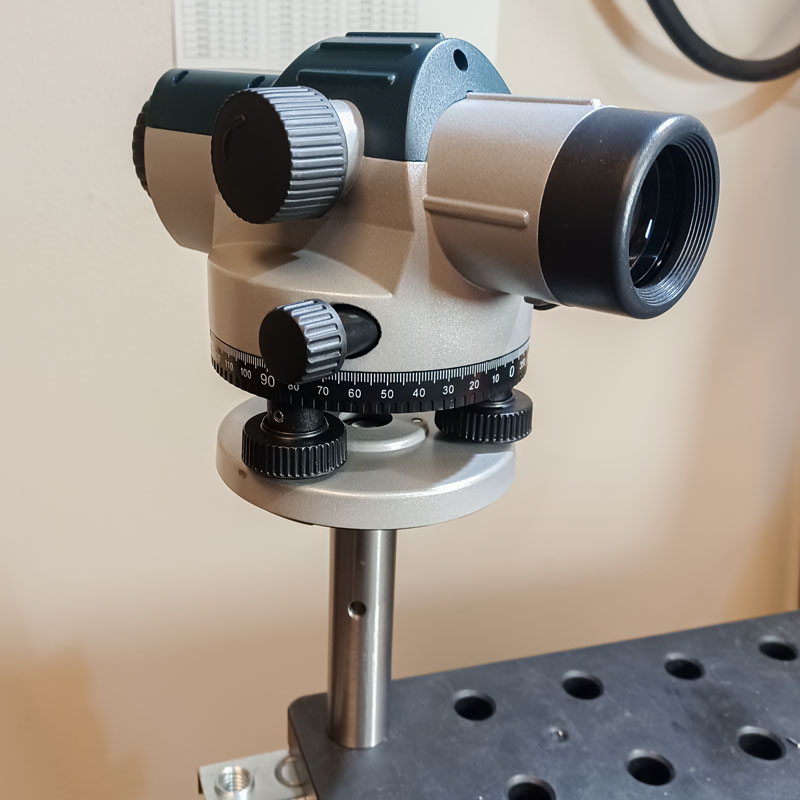
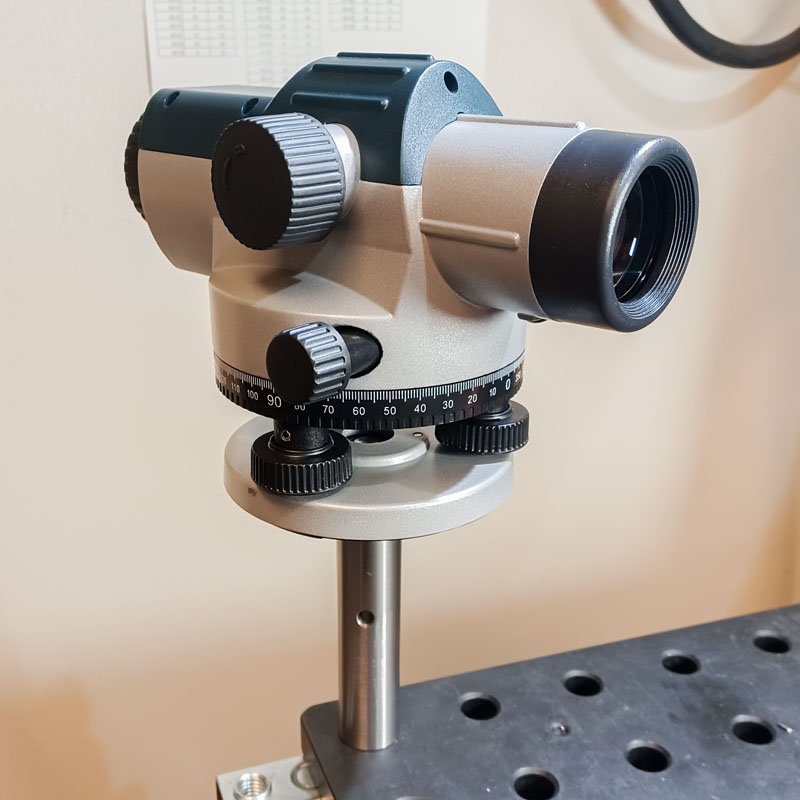
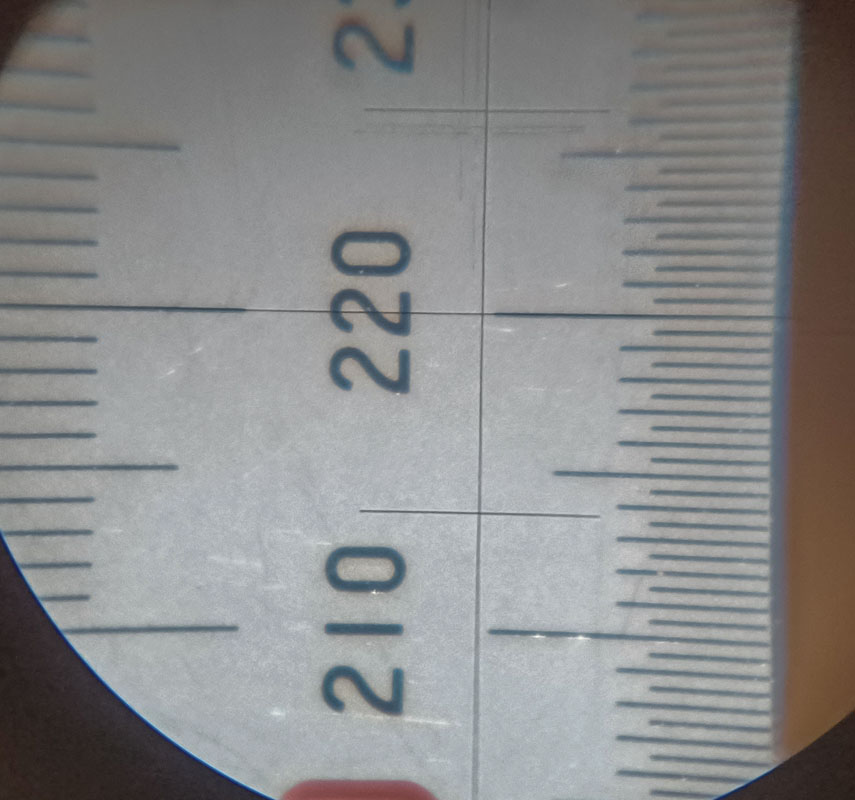
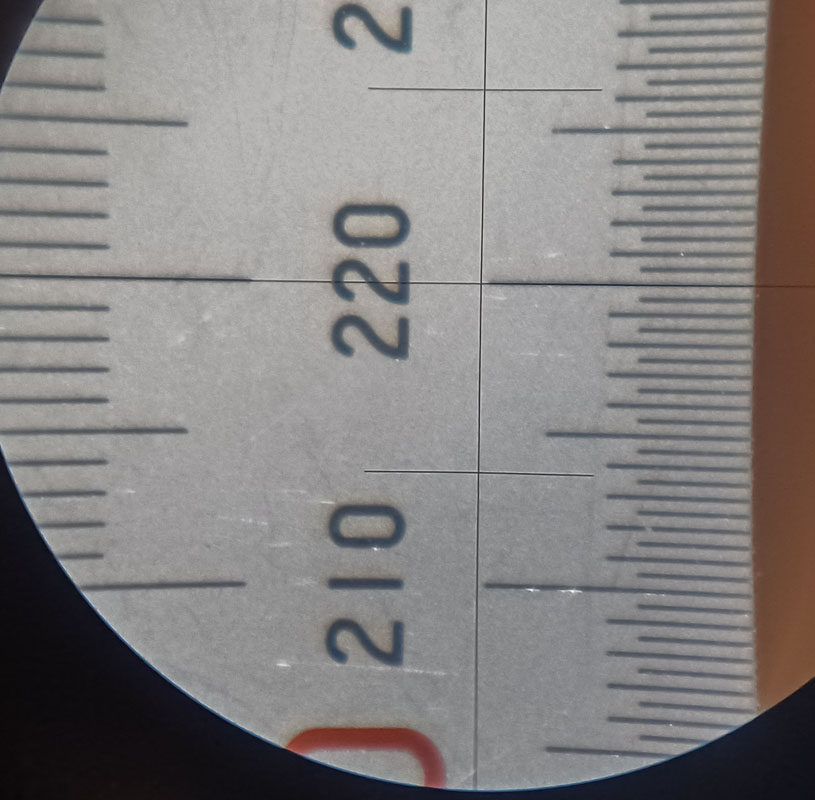
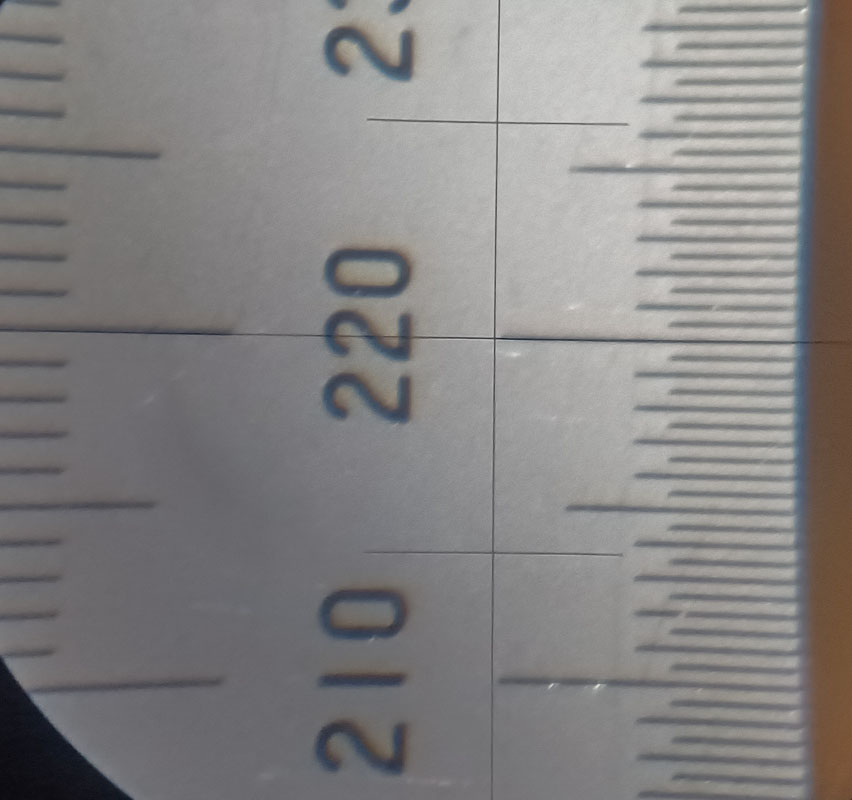
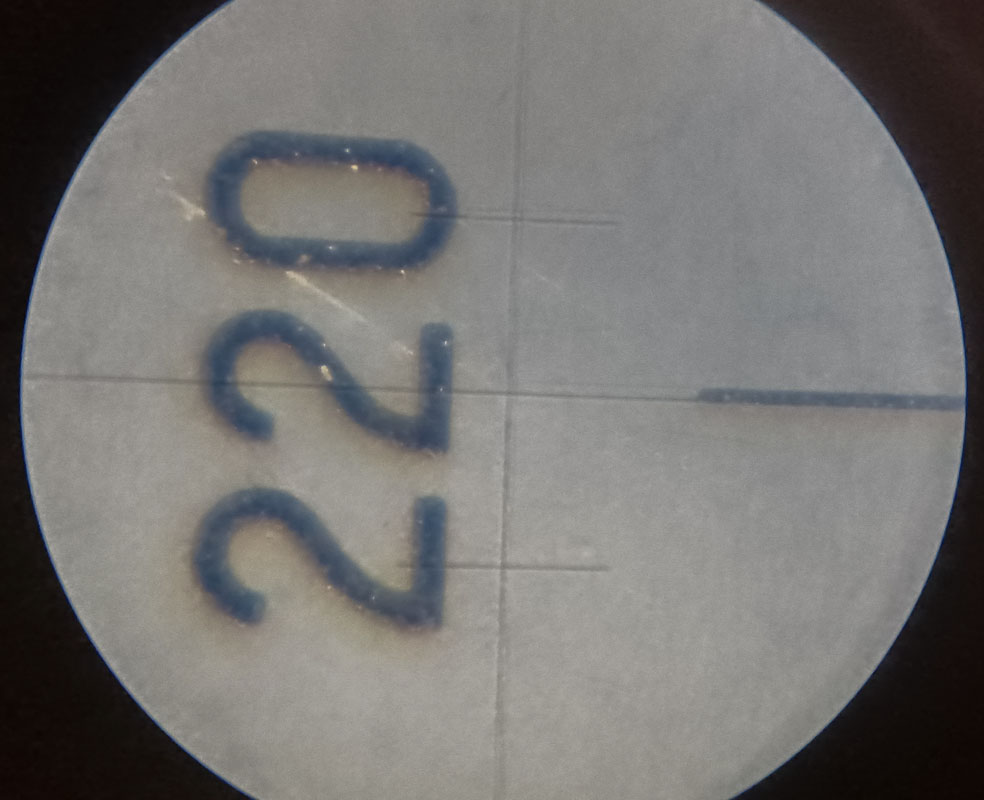
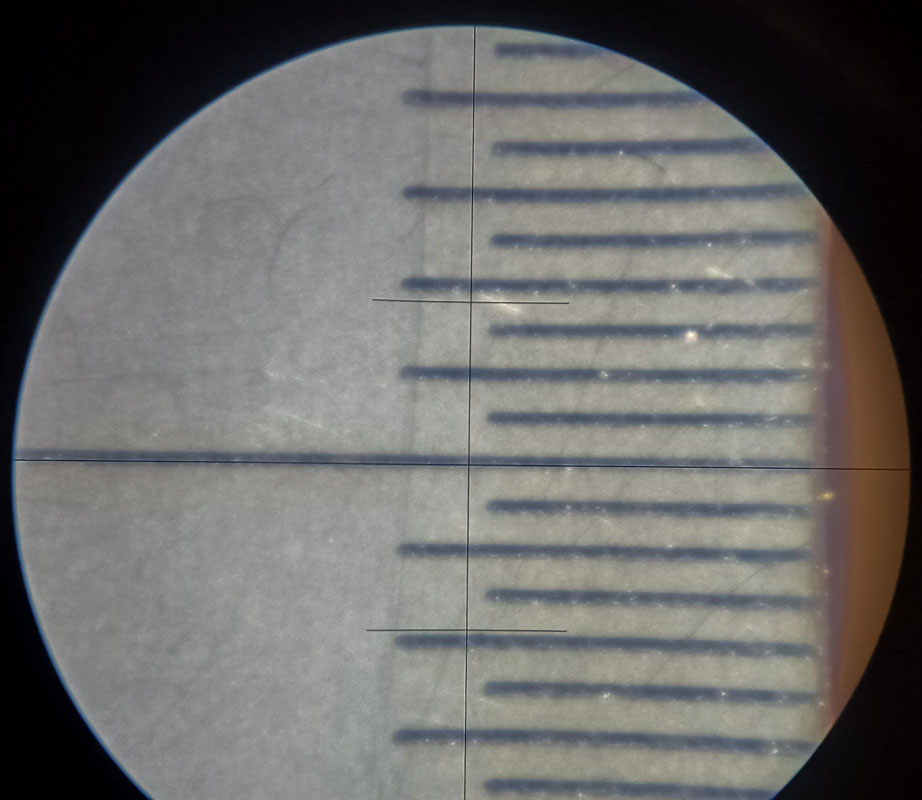
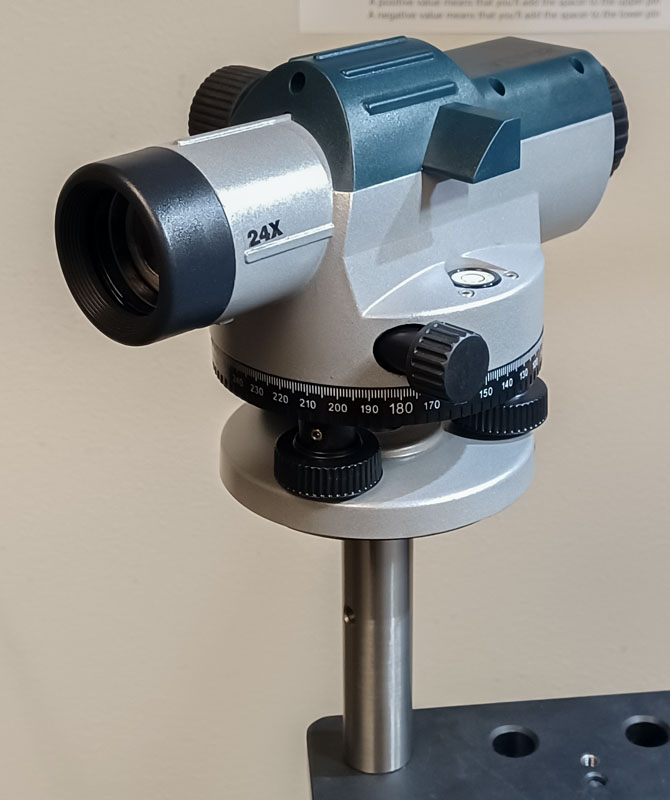
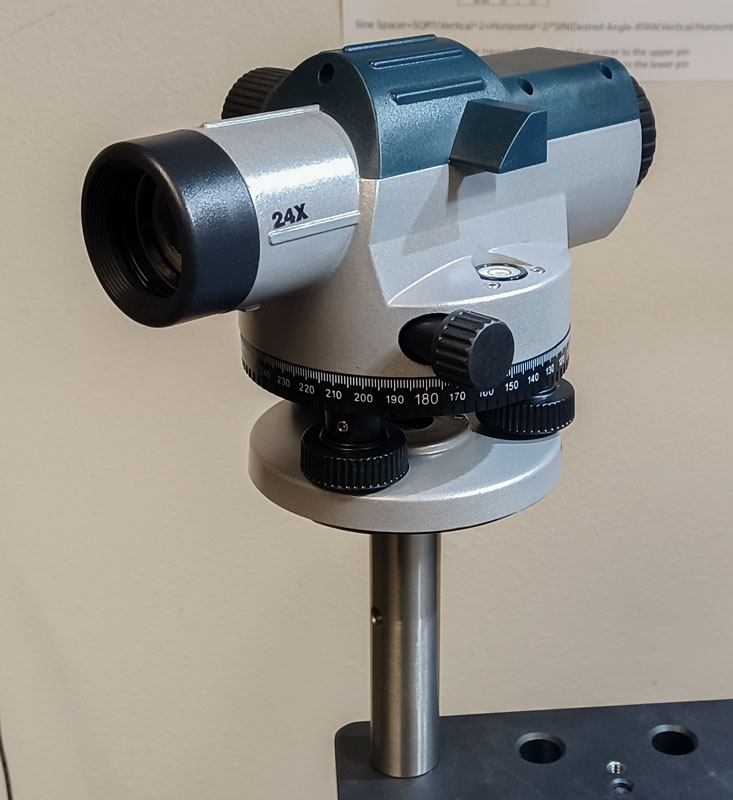
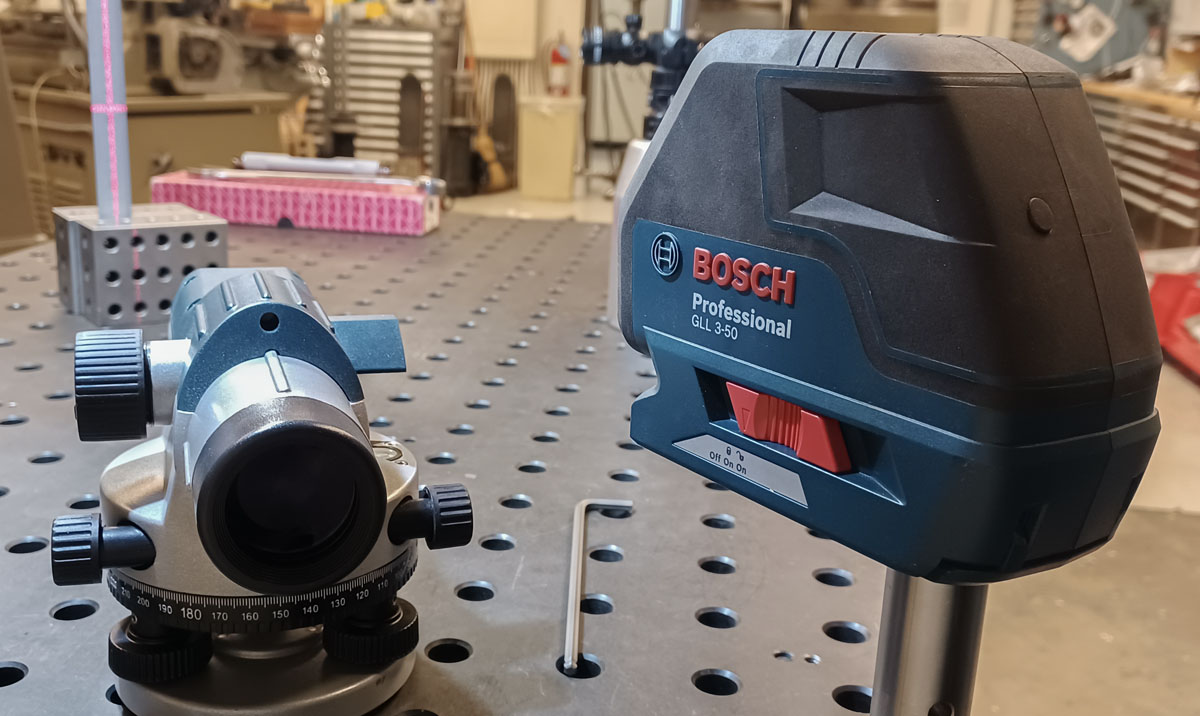
Mounting a construction/surveyors Automatic Optical Level to the table at 220mm gives an even finer way of looking out over the table. I purchased a very cheap 24X unit from Vevor for $89.99.
This is so nice but there are two issues. I’ve found with it is that it won’t focus closer than 300mm from the end aperture. I need to find something that can bring that down to 150mm or less. The ‘automatic’ leveling of the optics are a small issue. That forces the table to be very highly leveled to earth also. It would be nice to be able to calibrate the plane of the level to the table separately.
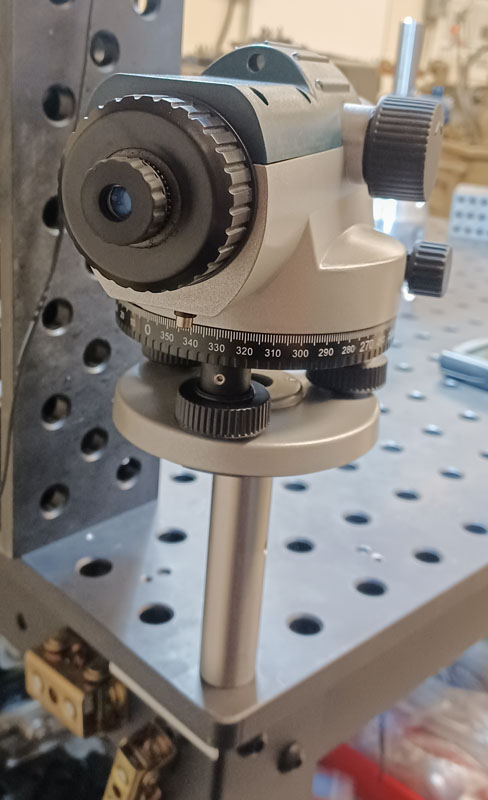
For many of these tools, a 5/8″-11 thread is what’s needed to produce a mount. I made a nice pillar for this setup. It’s 1″ steel as that was convenient. It would be better to be 1.5″ or greater for stiffness.
The fine reticle of this tool is clearly superior to the laser in terms of precision. I’d estimate that it’s safe to call this 1/10ths of millimeters in registration. This is the direction to go!

I would like to do more research into a optical level that isn’t automatic. I’m not convinced that the leveling of this cheap tool is close to the level of my 12″ machinist level. This would allow me to calibrate the optical plane to the table as it sits rather than relying on the level of the table. It seems that the same calibration is required on many levels so why not de-couple from gravity? Please let me know if you have a good recommendation for this.
Basically, I want a theodolite, cathetometer, or transit level that can focus quite close to the end aperture of the optic.
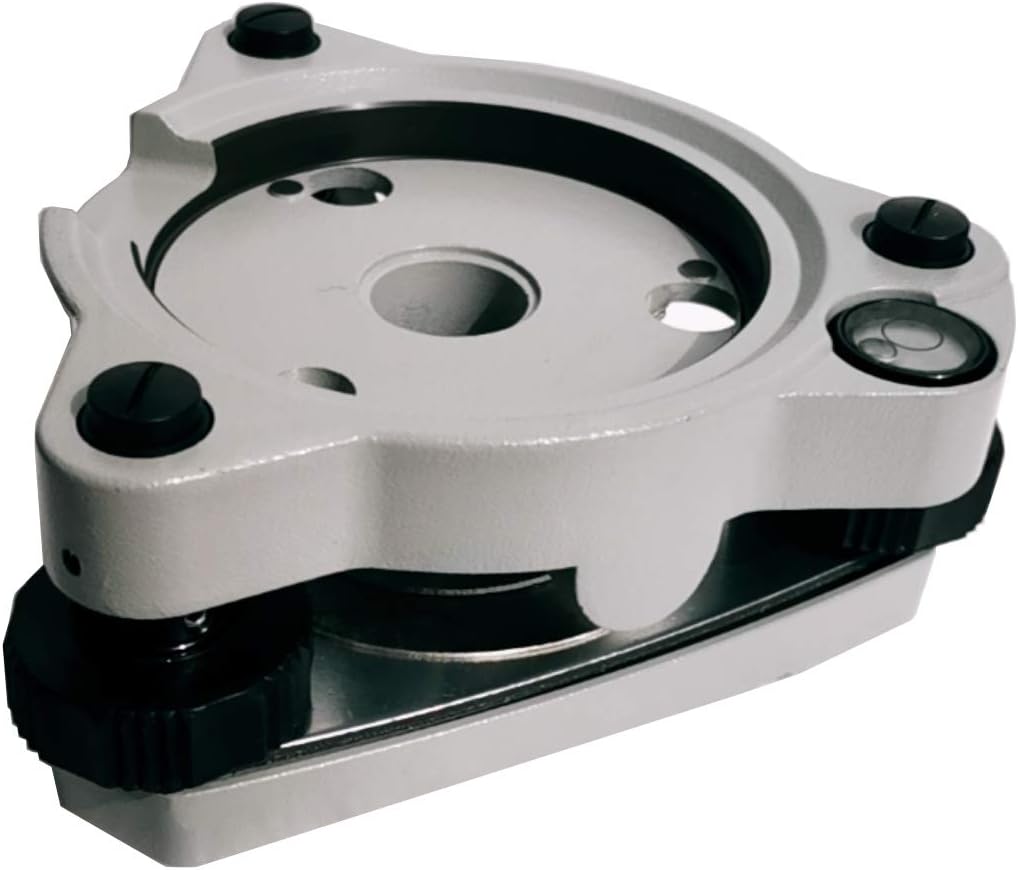
For sure, I’ll be moving to a standard and highly accurate tribrach and adapter pattern. This will allow for several types of attachments to be mounted and brought level or parallel to the table. I have a set of cheap Mountlaser FDJ01G & FG01T on the way to test. This is an exciting direction.
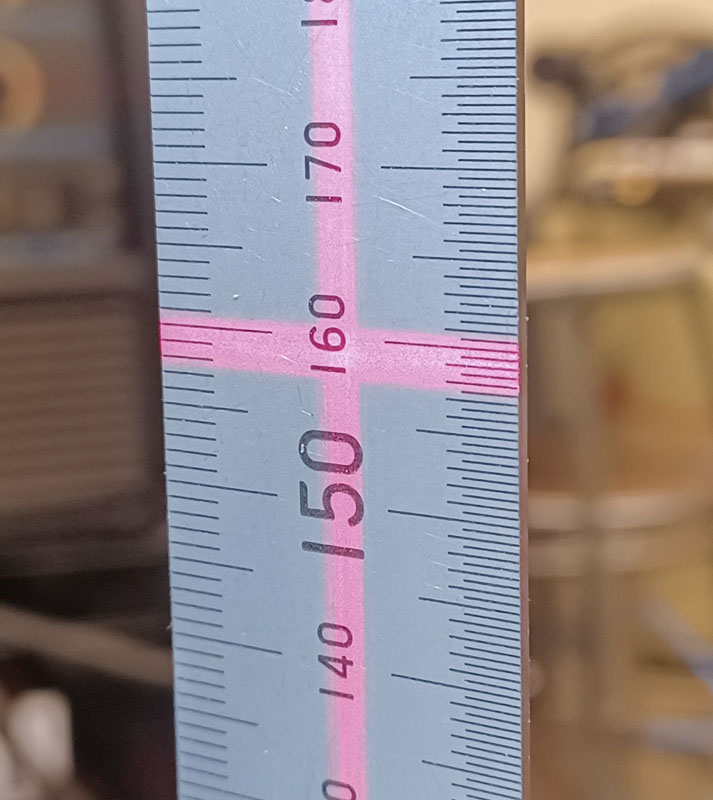
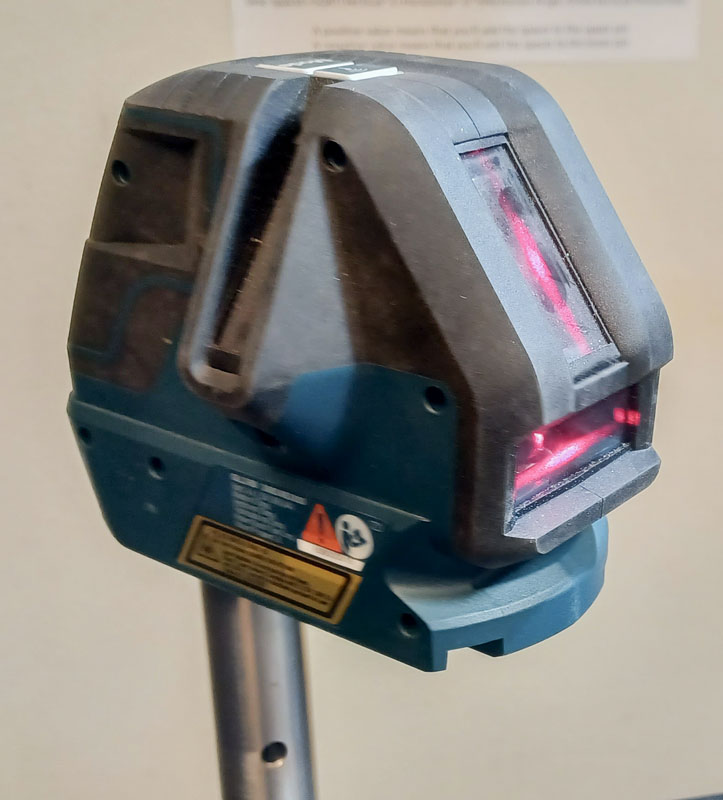
While I was working with these concepts, I also mounted a Bosch GLL 3-50 line level to the post on the table. This if I need more than a point at the cost of fine reading. The nearly 4mm dot size of the laser is useless for precision work but the linear qualities can be good for some use.